ASUS Zenbook 14

ASUS Zenbook 14 Laptop (2026) Review: OLED Performance for Designers and Professionals

ASUS Zenbook 14

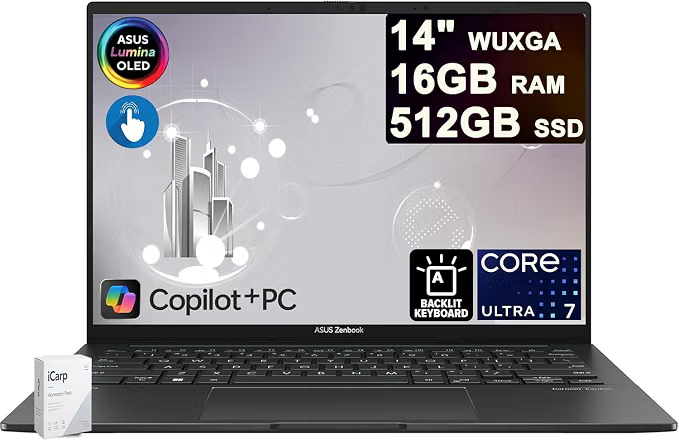
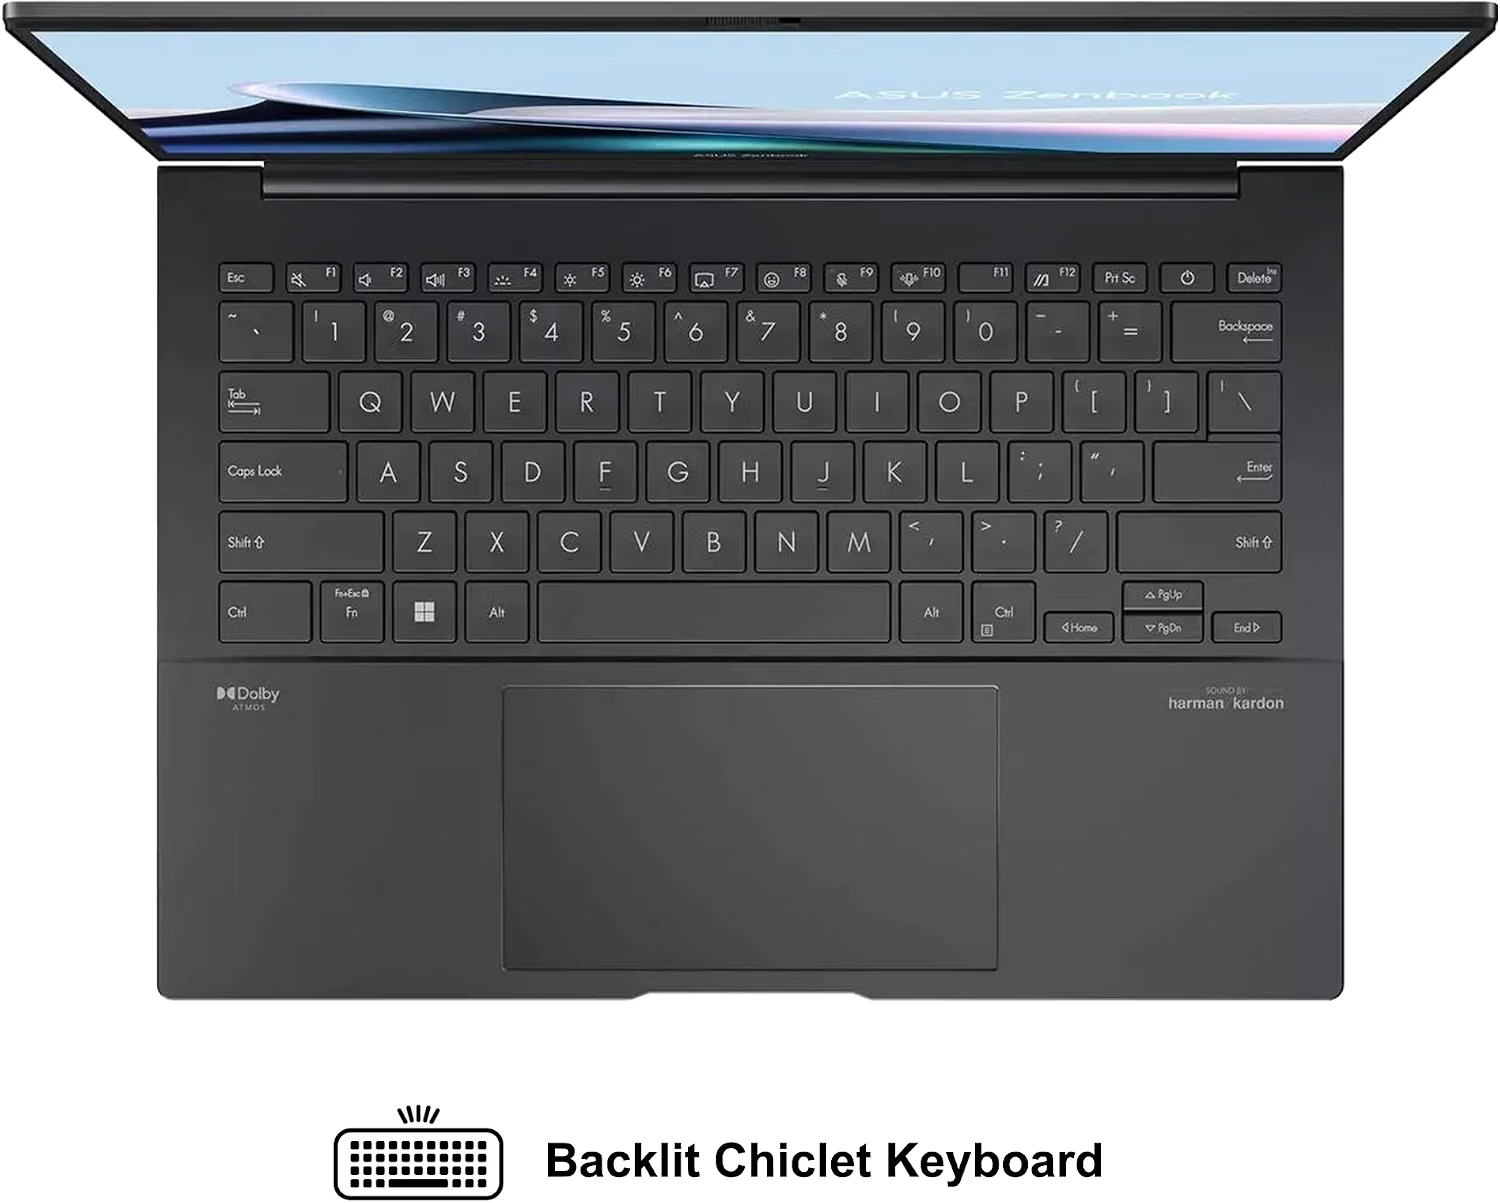
The ASUS Zenbook 14 Laptop 14″ WUXGA OLED Touch is designed for users who want a combination of premium display quality, strong processing performance, portability, and professional productivity. With an Intel Core Ultra 7 255H processor, 16GB RAM, 512GB SSD, and a 14-inch OLED touchscreen, it is particularly appealing to designers, business professionals, content creators, and students who need a capable laptop for demanding everyday workloads.

ASUS Zenbook 14 at a Glance

FeatureSpecification
Display14-inch WUXGA OLED touchscreen
Resolution1920 × 1200
BrightnessUp to 500 nits HDR
Colour100% DCI-P3
ProcessorIntel Core Ultra 7 255H, 16-core
Memory16GB RAM
Storage512GB SSD
Operating SystemWindows 11
Best ForDesigners, professionals, creators and business users

1. OLED Touchscreen for Creative Work

One of the biggest attractions of this Zenbook 14 configuration is its 14-inch WUXGA OLED touchscreen. OLED technology can provide deep blacks, excellent contrast, and vibrant colours, making it particularly useful for people working with photographs, graphics, videos, presentations, and other visual content.

The advertised 100% DCI-P3 colour coverage is another major advantage for creative professionals. A wide colour gamut allows the display to reproduce a broader range of colours than conventional displays, which can make visual work more immersive.

The touchscreen also provides an additional way to interact with Windows 11, especially when navigating creative applications, presentations, or other touch-friendly software.

2. Intel Core Ultra 7 255H Processor

The laptop is equipped with Intel’s Core Ultra 7 255H, a modern high-performance mobile processor with 16 cores. This gives the machine substantial processing capability for multitasking and demanding professional applications.

For a business professional, this can mean comfortably running multiple browser tabs, office applications, communication software, spreadsheets, and other programs simultaneously.

For designers and content creators, the processor can also provide the performance needed for tasks such as photo editing, graphic design, coding, and moderate video-production workflows.
3. 16GB RAM for Multitasking

The included 16GB of RAM provides a useful balance between performance and everyday usability.

You can work with several applications at once without constantly closing programs to free up memory. For example, a designer might have Photoshop, a web browser, email, cloud storage, and a communication application open simultaneously.

However, professionals working with exceptionally large projects, extensive 3D workloads, or very demanding video-production applications may want to consider a configuration with more memory if one is available.

4. 512GB SSD Storage

The 512GB SSD provides considerably faster storage performance than a traditional mechanical hard drive.

This helps with:

  • Faster Windows startup
  • Quicker application launches
  • Faster file access
  • More responsive everyday computing
  • Convenient storage for documents and creative projects

For business users, 512GB should be sufficient for documents, presentations, applications, and general work. Designers who maintain large libraries of RAW photographs, 4K video files, or other large media collections may eventually need an external SSD or cloud storage.

5. Portable Design for Business Professionals

A 14-inch laptop is a practical size for professionals who frequently move between an office, home, client meetings, cafés, and other work locations.

The Zenbook line is known for focusing on portability and premium design, making this type of configuration attractive to professionals who don’t want to carry a bulky workstation everywhere.

The 14-inch form factor also provides a reasonable compromise between screen size and portability.

6. Windows 11 for Modern Productivity

The laptop comes with Windows 11, giving users access to Microsoft’s current desktop operating system and its ecosystem of productivity applications.

This makes the Zenbook suitable for common professional tasks such as:

  • Microsoft Office
  • Web browsing
  • Email
  • Video conferencing
  • Digital marketing
  • SEO
  • Content creation
  • Graphic design
  • Programming
  • Business management

ASUS Zenbook 14 Pros and Cons

Pros

  • Excellent OLED touchscreen
  • 100% DCI-P3 colour coverage
  • 500-nit HDR capability
  • Powerful Intel Core Ultra 7 255H processor
  • 16GB RAM
  • Fast 512GB SSD
  • Portable 14-inch form factor
  • Well suited to business and creative work
  • Windows 11 included

Cons

  • 512GB may feel limited for large media libraries
  • 16GB RAM may not satisfy some advanced professional workloads
  • Integrated graphics configurations may not replace a dedicated GPU workstation for demanding 3D work
  • OLED panels can consume more power during certain workloads

Who Should Buy the ASUS Zenbook 14?

The ASUS Zenbook 14 is particularly attractive for business professionals, designers, digital marketers, writers, developers, students, and content creators who prioritise display quality and portable performance.

It is especially compelling if you spend significant time looking at images, websites, presentations, videos, or other visual content.

For someone who needs a laptop primarily for browsing, documents, email, meetings, and productivity, this configuration offers more display and processing capability than necessary—but that extra performance can provide useful headroom for future workloads.

Who Should Look Elsewhere?

The Zenbook 14 may not be the ideal choice for users whose primary workloads require a powerful dedicated graphics card.

Professional 3D artists, advanced CAD users, high-end video editors, and serious gamers should compare it with laptops featuring dedicated NVIDIA or AMD graphics.

Likewise, users who need extensive local storage may prefer a model with a 1TB or larger SSD.

Final Verdict

The ASUS Zenbook 14 14-inch WUXGA OLED Touch combines a high-quality OLED display with a powerful Intel Core Ultra 7 255H processor, 16GB RAM, and 512GB SSD. Its combination of colour accuracy, portability, touchscreen functionality, and processing performance makes it an appealing option for designers and business professionals.

If your priorities are a premium display, strong multitasking performance, portability, and a professional Windows 11 experience, this Zenbook configuration deserves serious consideration.

Get an Asus Zenbook 14 on Amazon


READ ALSONigerians Chasing Digital Marketing Jobs in 2026: Here’s the Actual Roadmap
[slick-slider]
WinsPad20

How Do I Install Touchscreen Drivers on My Winspad 20?

If your Winspad 20 touchscreen has stopped responding, a driver problem could be responsible. Windows depends on touchscreen drivers to communicate with the device’s touch hardware.

Fortunately, you can troubleshoot many touchscreen problems without professional assistance. This guide explains how to install touchscreen drivers on your Winspad 20.

It also covers touchscreen calibration, Windows updates, Device Manager errors, and common driver problems.

Whether your touchscreen stopped working after a Windows update or never worked correctly, these steps can help.

What Is a Touchscreen Driver?

A touchscreen driver allows Windows to communicate with your device’s touchscreen hardware. It translates touch input into commands that Windows can understand.

Without the appropriate driver, your Winspad 20 may not recognise touch input correctly.

A damaged, outdated, missing, or incompatible driver can also cause touchscreen problems. Therefore, checking the driver should be one of your first troubleshooting steps.

Why Is My Winspad 20 Touchscreen Not Working?

Several issues can cause touchscreen problems on a Winspad 20. Understanding the possible cause makes troubleshooting easier.

Common causes include:

  • Missing touchscreen drivers
  • Outdated device drivers
  • Corrupted driver files
  • Disabled touchscreen hardware
  • Windows update problems
  • Incorrect driver installation
  • Hardware damage
  • Windows system errors
  • Touchscreen calibration problems
  • Incompatible operating system updates

Sometimes, restarting the device fixes temporary software problems. However, persistent problems usually require additional troubleshooting.

How Do I Install Touchscreen Drivers on My Winspad 20?

The safest approach is to identify the correct driver before installing anything. Driver compatibility matters because an incorrect driver can create additional problems.

Follow the steps below carefully.

Step 1: Check Your Winspad 20 Model

First, identify the exact Winspad 20 model and Windows version installed on your device.

Open Settings and select System. Then, choose About.

Check the information displayed under device specifications and Windows specifications.

Record details such as:

  • Device model
  • Processor
  • Windows edition
  • Windows version
  • System type

These details can help you identify compatible drivers.

If your device has a model number printed on its casing, record that information too.

Step 2: Check Device Manager

Device Manager is one of the most useful Windows tools for troubleshooting touchscreen problems.

Press Windows + X on your keyboard. Then, select Device Manager.

Find Human Interface Devices and expand the category.

Look for an entry called HID-compliant touch screen.

You may see more than one HID device. Therefore, avoid changing unrelated devices unless you know what they do.

If the touchscreen appears in Device Manager, Windows recognises the hardware.

However, the driver could still be outdated or damaged.

Step 3: Check Whether the Touchscreen Is Disabled

A disabled touchscreen can appear to be completely broken.

Right-click HID-compliant touch screen in Device Manager.

Look for an option labelled Enable device.

If you see this option, select it.

The touchscreen should become available after Windows enables the device.

If you instead see Disable device, the touchscreen is already enabled.

Restart your Winspad 20 and test the screen again.

Step 4: Update the Touchscreen Driver

You can update the touchscreen driver directly through Device Manager.

Right-click HID-compliant touch screen.

Next, select Update driver.

Windows will provide options for finding the appropriate driver.

If Windows can locate a newer compatible driver, follow the installation instructions.

After installation finishes, restart your Winspad 20.

Then, test the touchscreen by tapping several areas of the display.

Step 5: Install a Downloaded Driver Manually

Sometimes Windows cannot locate the correct driver automatically.

In this situation, you may need to install the driver manually.

First, download the appropriate touchscreen driver from a trusted manufacturer or support source.

Save the driver to an easily accessible folder.

Next, open Device Manager again.

Expand Human Interface Devices and locate the touchscreen device.

Right-click it and choose Update driver.

Select Browse my computer for drivers.

Navigate to the folder containing your downloaded driver.

Select the appropriate folder and continue with the installation.

Once installation finishes, restart the tablet.

Never install drivers from suspicious websites. Untrusted driver packages can contain unwanted software or incompatible files.

Step 6: Use Windows Update

Windows Update can sometimes provide compatible hardware drivers.

Open Settings and select Windows Update.

Click Check for updates.

Allow Windows to download and install available updates.

Also check Advanced options and look for Optional updates.

Some Windows versions list hardware drivers under optional updates.

If a touchscreen-related driver appears, install it.

Restart the Winspad 20 afterward.

Step 7: Uninstall and Reinstall the Touchscreen Driver

A corrupted driver may continue causing problems after a standard update.

You can therefore remove the touchscreen driver and allow Windows to reinstall it.

Open Device Manager.

Expand Human Interface Devices.

Right-click HID-compliant touch screen.

Select Uninstall device.

Confirm the removal when Windows asks for confirmation.

Afterward, restart your Winspad 20.

Windows may automatically detect the touchscreen hardware and reinstall its driver.

Check Device Manager after restarting.

Then, test whether touch input works normally.

Step 8: Restart Your Winspad 20

Restarting Windows sounds simple, but it can resolve many temporary driver problems.

Save your work before restarting.

Then, select Start, choose Power, and select Restart.

Avoid using sleep mode when troubleshooting drivers.

A complete restart gives Windows another opportunity to initialise the touchscreen hardware.

After restarting, test basic touch functions.

Try tapping icons, scrolling through menus, and opening applications.

Step 9: Check for Windows Driver Errors

Device Manager can provide useful clues when a touchscreen does not work.

Open Device Manager and locate the touchscreen device.

Look for warning symbols beside the device.

A yellow warning icon can indicate a driver or hardware problem.

Right-click the device and select Properties.

Check the Device status section.

Windows may display an error code explaining the problem.

Write down the error code before changing anything.

This information can help you find the appropriate troubleshooting solution.

Step 10: Run Windows Troubleshooting Tools

Windows includes several troubleshooting features that can identify system problems.

Open Windows Settings and search for available troubleshooting options.

Depending on your Windows version, available troubleshooters may differ.

You can also use Device Manager to inspect the touchscreen device.

If Windows identifies a driver issue, follow the recommended instructions.

After applying a fix, restart your device.

How to Calibrate the Winspad 20 Touchscreen

Sometimes the touchscreen works but responds inaccurately.

For example, you may tap one location while Windows registers another.

Calibration can help resolve this problem.

Search Windows for Calibrate the screen for pen or touch input.

Open the corresponding Control Panel option.

Select the calibration option and follow the instructions.

Windows will display points that you need to touch.

Tap each point accurately when prompted.

Save the calibration settings when finished.

Test the screen afterward.

If calibration makes the touchscreen less accurate, return to the previous settings when possible.

What to Do If the Winspad 20 Touchscreen Still Does Not Work

If driver installation does not solve the problem, investigate other possible causes.

First, check whether the touchscreen appears in Device Manager.

If it does not appear, Windows may not be detecting the hardware correctly.

Next, restart the device and check again.

You should also install available Windows updates.

If the touchscreen remains missing, the problem could involve firmware or hardware.

Physical damage can also prevent touchscreen functionality.

For example, drops, pressure, liquid exposure, or damaged internal connections can affect touchscreen operation.

In such cases, software troubleshooting may not solve the problem.

Consider contacting qualified technical support if hardware damage is suspected.

Can a Windows Update Break the Winspad 20 Touchscreen?

Yes, Windows updates can sometimes create driver compatibility problems.

A major Windows update may replace existing drivers or introduce compatibility issues.

If your touchscreen stopped working immediately after an update, consider checking Device Manager first.

You can also look for a newer compatible driver.

If the manufacturer provides an updated driver, installing it may resolve the problem.

Avoid randomly installing older drivers from unofficial websites.

How to Prevent Future Winspad 20 Driver Problems

Keeping your system updated can reduce driver-related problems.

However, you should avoid installing unnecessary driver packages.

Download drivers from trustworthy sources whenever possible.

Create a system restore point before making significant driver changes.

Additionally, keep important files backed up.

Before installing major Windows updates, ensure your important data is protected.

These simple precautions can make troubleshooting much easier.

Common Winspad 20 Touchscreen Driver Mistakes

Several mistakes can make touchscreen troubleshooting more difficult.

One common mistake is installing a driver designed for a different model.

Another is downloading drivers from unknown websites.

Some users also uninstall several HID devices without knowing their purpose.

This can create additional hardware problems.

Therefore, change only the device associated with your touchscreen.

Also, restart Windows after installing or removing a driver.

A restart allows Windows to reload the hardware configuration.

Winspad 20 Touchscreen Driver Troubleshooting Checklist

Use this checklist when your touchscreen stops working:

  1. Confirm your Winspad 20 model.
  2. Check your Windows version.
  3. Open Device Manager.
  4. Find HID-compliant touch screen.
  5. Check whether the device is enabled.
  6. Update the touchscreen driver.
  7. Install the correct driver manually if necessary.
  8. Check Windows Update.
  9. Uninstall and reinstall the touchscreen driver.
  10. Restart the Winspad 20.
  11. Check Device Manager for error codes.
  12. Calibrate the touchscreen if necessary.
  13. Inspect the device for possible physical damage.
  14. Contact technical support if software troubleshooting fails.

Frequently Asked Questions About Winspad 20 Touchscreen Drivers

How do I install touchscreen drivers on my Winspad 20?

Open Device Manager and expand Human Interface Devices.

Find HID-compliant touch screen, then select Update driver.

You can also manually install a compatible driver from a trusted source.

Restart the device after installation.

Why is my Winspad 20 touchscreen not responding?

A missing, damaged, outdated, or disabled driver could cause the problem.

Windows updates can also create compatibility issues.

Hardware damage is another possible cause.

Start by checking Device Manager for the touchscreen device.

Where can I find the Winspad 20 touchscreen driver?

Look for the driver through the device manufacturer’s official support resources.

You should identify your exact model before downloading anything.

Avoid websites offering unknown or modified driver packages.

How do I enable my Winspad 20 touchscreen?

Open Device Manager and expand Human Interface Devices.

Find HID-compliant touch screen.

Right-click the device and select Enable device if available.

Can I reinstall the Winspad 20 touchscreen driver?

Yes.

You can uninstall the touchscreen device through Device Manager.

Then restart Windows.

Windows may automatically reinstall the required driver.

Why does my touchscreen work after restarting but stop later?

Temporary driver or Windows processes may be causing the problem.

Check for Windows updates and driver updates.

Also inspect Device Manager for warning messages.

Does touchscreen calibration fix an unresponsive screen?

Calibration primarily addresses inaccurate touch positioning.

It generally does not fix hardware or driver failures.

If the screen does not detect touch at all, troubleshoot the driver first.

What if the touchscreen does not appear in Device Manager?

Restart Windows and check Device Manager again.

Then install available Windows updates.

If the device remains missing, investigate firmware and hardware issues.

Professional technical support may be necessary if Windows cannot detect the hardware.

Adreamer WinsPad

Why Isn’t My Touchscreen Working on My Winspad?

A touchscreen makes your Winspad easier to use and navigate. However, touchscreen problems can happen unexpectedly.

Sometimes, the screen stops responding completely. In other cases, only certain areas respond to touch.

Fortunately, several simple solutions can restore touchscreen functionality. Follow these troubleshooting steps before seeking professional assistance.

Restart Your Winspad

First, restart your Winspad to resolve temporary system problems.

A restart can refresh system processes and restore touchscreen responsiveness. Therefore, save your work before restarting the device.

Press and hold the power button until the device shuts down. Then, wait several seconds before turning it back on.

After restarting, test the touchscreen again. If it works normally, a temporary software issue probably caused the problem.

Clean the Touchscreen

Dirt, dust, moisture, and fingerprints can affect touchscreen sensitivity. Consequently, clean the display before trying more complicated solutions.

Turn off your Winspad first. Then, gently wipe the screen with a clean microfiber cloth.

Avoid using excessive moisture directly on the display. Also, avoid harsh cleaning chemicals that could damage the screen.

Once the screen becomes completely dry, test touch functionality again.

Remove Your Screen Protector

A damaged or poorly installed screen protector can interfere with touch sensitivity.

Therefore, inspect your screen protector carefully for cracks, bubbles, or peeling edges.

If possible, remove the protector temporarily. Then, test the touchscreen without it.

If the touchscreen works again, replace the screen protector with a compatible model.

Check for Software Updates

Outdated software can sometimes cause touchscreen problems. Manufacturers regularly release updates that fix bugs and improve device compatibility.

Open your Winspad’s settings menu and check for available system updates.

Install any recommended updates and restart the device afterward. Then, test the touchscreen again.

Keeping your device updated can also prevent similar problems in the future.

Check Touchscreen Settings

Incorrect settings may also affect touchscreen performance. Therefore, review your device’s touch-related settings.

Look for options controlling touch sensitivity, gestures, or display interaction.

Make sure touchscreen functionality remains enabled. Additionally, disable settings that could interfere with normal touch input.

After making changes, restart your Winspad and test the display.

Disconnect External Accessories

Connected accessories can occasionally interfere with device operation. This issue may involve keyboards, mice, USB devices, or other peripherals.

Disconnect every external accessory from your Winspad. Then, restart the device and test the touchscreen.

If the screen works afterward, reconnect each accessory individually. This approach can help identify the problematic device.

Check for Physical Damage

Physical damage can prevent a touchscreen from responding correctly.

Inspect the display for cracks, deep scratches, unusual marks, or signs of impact. Also, check whether the screen has become separated from the device body.

Water or liquid exposure can create touchscreen problems too. If your Winspad suffered physical or liquid damage, avoid opening it yourself.

Instead, seek assistance from a qualified technician.

Perform a Factory Reset

A factory reset can resolve persistent software-related touchscreen problems. However, use this option only after trying other solutions.

A reset removes personal data, installed applications, and customised settings. Therefore, back up important files before proceeding.

Follow your Winspad’s official reset instructions carefully. Afterward, test the touchscreen before reinstalling applications.

When Should You Contact a Technician?

If none of these solutions works, the touchscreen may have a hardware problem.

A faulty digitiser, damaged display, loose connection, or internal component can cause touch failure.

Professional diagnosis can identify the exact cause. Moreover, qualified technicians can replace damaged components safely.

Avoid forcing the screen or opening the device without proper experience.

Final Thoughts

A non-responsive Winspad touchscreen does not always indicate serious damage.

Start with simple solutions, including restarting the device and cleaning the screen. Next, check accessories, software updates, settings, and physical damage.

If these methods fail, professional repair may provide the best solution.

With proper troubleshooting, you can often restore touchscreen functionality without replacing the entire device.

Surface Pro 8 2 in 1

Microsoft Surface Pro 8 Review: Is It Still Worth Buying in 2026?

Surface Pro 8 2 in 1

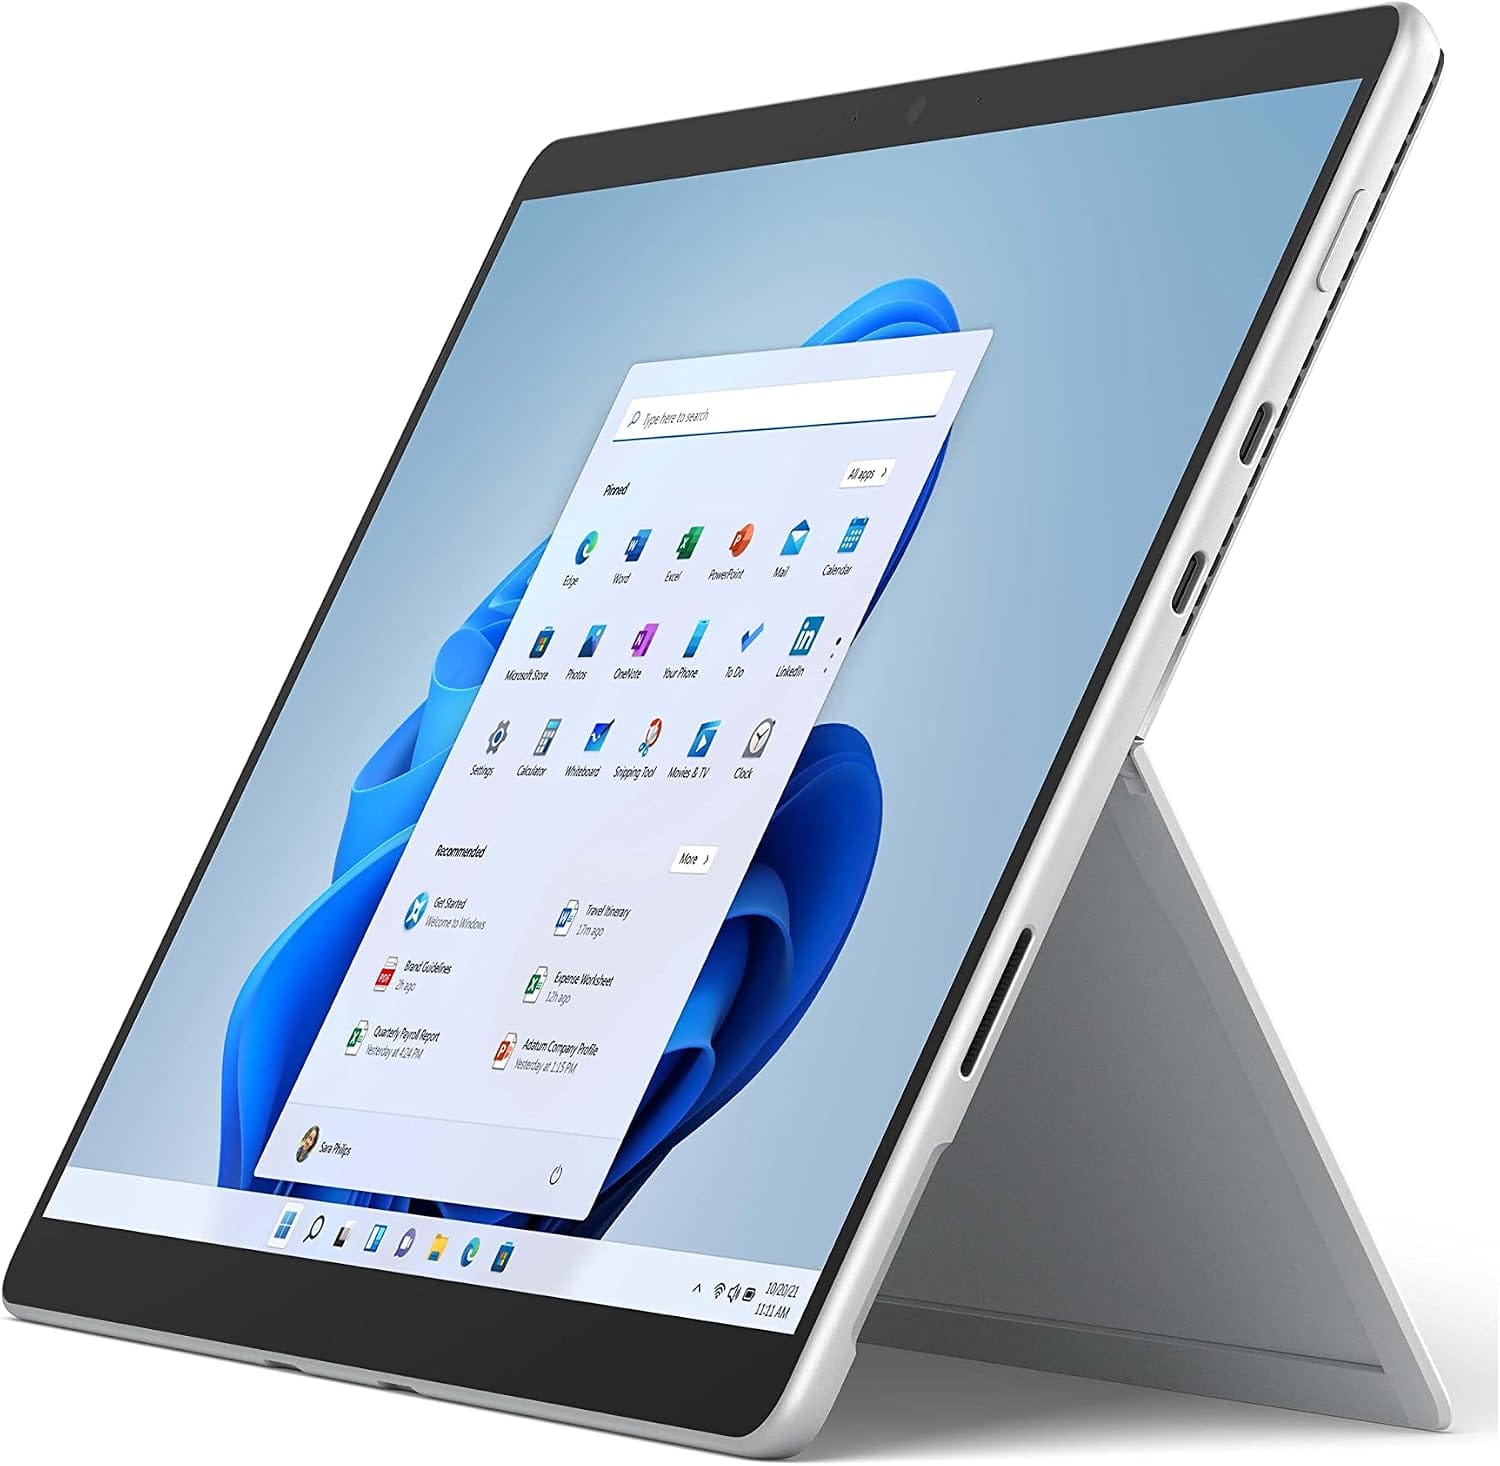
The Microsoft Surface Pro 8 remains a popular choice for hybrid device shoppers. However, many buyers still wonder if it holds up today. In this review, we break down its design, performance, and value. As a result, you’ll know exactly what to expect before you buy.

Design and Build Quality

First, let’s talk about the design. The Surface Pro 8 keeps the familiar tablet-laptop hybrid form factor. Meanwhile, Microsoft refined the chassis with slimmer bezels and rounded edges. Consequently, the device feels more modern than its predecessors. The kickstand still offers smooth, reliable adjustment. In addition, the magnesium body feels sturdy without adding bulk. Overall, the build quality reflects premium craftsmanship throughout.

Display Performance

Next, the display deserves close attention. The Surface Pro 8 features a 13-inch PixelSense screen. Furthermore, it supports a 120Hz refresh rate for smoother scrolling. Therefore, everyday tasks like browsing and typing feel noticeably fluid. Colors appear vibrant, and brightness levels handle most lighting conditions well. Additionally, the aspect ratio suits productivity work better than entertainment. As a result, professionals will likely appreciate this screen the most.

Performance and Specifications

Moving on, let’s examine performance. The Surface Pro 8 runs on 11th Gen Intel Core processors. Meanwhile, buyers can choose between i5 and i7 configurations. Consequently, multitasking and everyday productivity feel snappy and responsive. RAM options go up to 32GB, which suits demanding workflows. However, gaming and heavy video editing may still push its limits. Still, for typical office and creative tasks, performance remains solid.

Battery Life

Battery life also plays a major role in daily usability. Microsoft claims up to 16 hours on a single charge. In real-world testing, though, results often land closer to 8-10 hours. Nevertheless, that’s still respectable for a device this thin. Additionally, fast charging helps top up power quickly between meetings. Therefore, most users won’t feel anxious about running out of juice.

Keyboard and Pen Experience

Equally important, the accessories elevate the overall experience. Unfortunately, the Type Cover keyboard isn’t included in the box. Instead, buyers must purchase it separately, which raises the total cost. That said, once attached, the typing experience feels comfortable and precise. Meanwhile, the Slim Pen 2 offers excellent pressure sensitivity for sketching. As a result, creative professionals will find this combination genuinely useful.

Ports and Connectivity

In terms of connectivity, the Surface Pro 8 finally embraces modern standards. Specifically, it includes two Thunderbolt 4 USB-C ports. Consequently, users can connect external displays and fast storage with ease. However, the lack of a full-size USB-A port might frustrate some users. Still, most modern accessories now support USB-C, so this isn’t a dealbreaker.

Who Should Buy the Surface Pro 8?

So, who exactly benefits most from this device? Business professionals who value portability will appreciate it most. Similarly, students juggling notes and assignments will find the pen input useful. On the other hand, gamers and heavy editors should consider other options. Ultimately, the ideal buyer prioritizes flexibility over raw performance.

Final Verdict

In conclusion, the Microsoft Surface Pro 8 delivers a well-rounded hybrid experience. Its display, design, and connectivity all stand out as strengths. Meanwhile, battery life and included accessories fall slightly short of expectations. Nevertheless, for professionals seeking a lightweight, versatile device, it remains a strong contender. Therefore, if portability and productivity matter most, this device deserves serious consideration.


READ ALSOHow to Choose a Local SEO Agency for Your Business

[slick-slider]
apple watch series 10

Apple watch series 10 review

Buy on Amazon

The Apple Watch Series 10 [GPS + Cellular 46mm] with the Natural Milanese Loop offers a thinner, lighter design and a 30% larger display. It features advanced health monitoring tools, fitness tracking, cellular connectivity, and innovative safety functions like Fall Detection. This watch delivers unparalleled performance, making it a top choice for fitness enthusiasts and those prioritizing health and safety.

The Apple Watch Series 10 takes wearable technology to the next level with its enhanced design, health-tracking capabilities, and robust fitness features. Whether you’re an athlete, a health-conscious individual, or simply someone looking for a versatile smartwatch, the Series 10 offers it all. This review dives into its features and why it’s a game-changer in the world of smartwatches.

Product Information:

  • Model: Apple Watch Series 10 [GPS + Cellular 46mm]
  • Band: Natural Milanese Loop – M/L
  • Key Features: ECG App, Always-On Retina Display, fitness tracking, sleep monitoring, water resistance, cellular connectivity

Why People like the Apple Watch Series 10:

The Apple Watch Series 10 stands out because of its sleek design, comprehensive health and fitness features, and unmatched safety functionalities. The larger display, combined with improved sensors, ensures users can monitor their health with precision and ease. It also supports cellular connectivity, which allows for phone calls, messaging, and streaming without needing an iPhone nearby.

Features:

  • 30% Larger Display: With a thinner bezel, the display is easier to read and interact with, offering up to 30% more screen space.
  • Advanced Health Insights: The ECG app, heart rate notifications, and retrospective ovulation estimates allow users to keep track of their well-being.
  • Always-On Retina Display: Never miss a notification with the always-on screen, making it easier to check time and alerts at a glance.

Additional Features:

  • Fall and Crash Detection: Safety is paramount with fall detection and crash detection capabilities, automatically alerting emergency services if needed.
  • Sleep and Breathing Monitoring: Get insights into your sleep patterns and detect signs of sleep apnea with advanced tracking tools.
  • Water Resistance: Ideal for swimmers, the watch can withstand water depths and monitor water activities.

Warranty & Service:

Apple provides a standard one-year warranty on the Apple Watch Series 10, which can be extended with AppleCare+. This covers repairs, including accidental damage, ensuring your watch stays in top condition.

Other Users’ Opinions:

Users rave about the Apple Watch Series 10’s sleek design and comprehensive health features. Many appreciate the cellular connectivity and how it allows them to leave their iPhone behind during workouts or errands. The added safety features like crash detection and emergency SOS have given peace of mind to countless users.

Final Verdict:

The Apple Watch Series 10 is an essential gadget for anyone looking to improve their health and stay connected on the go. Its advanced health insights, fitness tracking, and safety features make it more than just a smartwatch. Whether you’re an athlete or someone who values well-being, this watch is worth the investment.

Pros:

  • 30% larger display
  • Advanced health insights with ECG and heart rate monitoring
  • Water-resistant and durable design
  • Cellular connectivity for calls and messaging without an iPhone
  • Fall and crash detection for added safety

Cons:

  • Premium price tag
  • Battery life could be longer for heavy users

The Apple Watch Series 10 [GPS + Cellular 46mm] with the Natural Milanese Loop offers an impressive range of health, fitness, and safety features in a stylish package. Its cellular capabilities and cutting-edge design make it a must-have for those who want a robust smartwatch. While it may come with a higher price, the features and benefits it offers are worth the investment.


READ ALSO: WatchOS 11 Is Here: The Top Health and Fitness Upgrades You Need to Know

SMARTWATCH REVIEWS

[slick-slider]
watchos 11

WatchOS 11 Is Here: The Top Health and Fitness Upgrades You Need to Know

watchos 11
image credit: Apple

Apple’s latest software for its wearables, watchOS 11, is officially available, bringing along a host of exciting features. If you own an Apple Watch Series 6 or newer, including the Apple Watch Ultra or the SE 2, you’ll definitely want to take advantage of these updates.

First revealed at WWDC 2024, watchOS 11 has a clear emphasis on health and wellness, underscoring the growing importance of the Apple Watch as a fitness-focused device. Years ago, the Apple Watch was primarily seen as a communication gadget, but now it’s transformed into a powerful health tool. Let’s dive into the five biggest health and fitness upgrades you’ll find in watchOS 11.

1. Vitals App: Monitoring Your Health 24/7

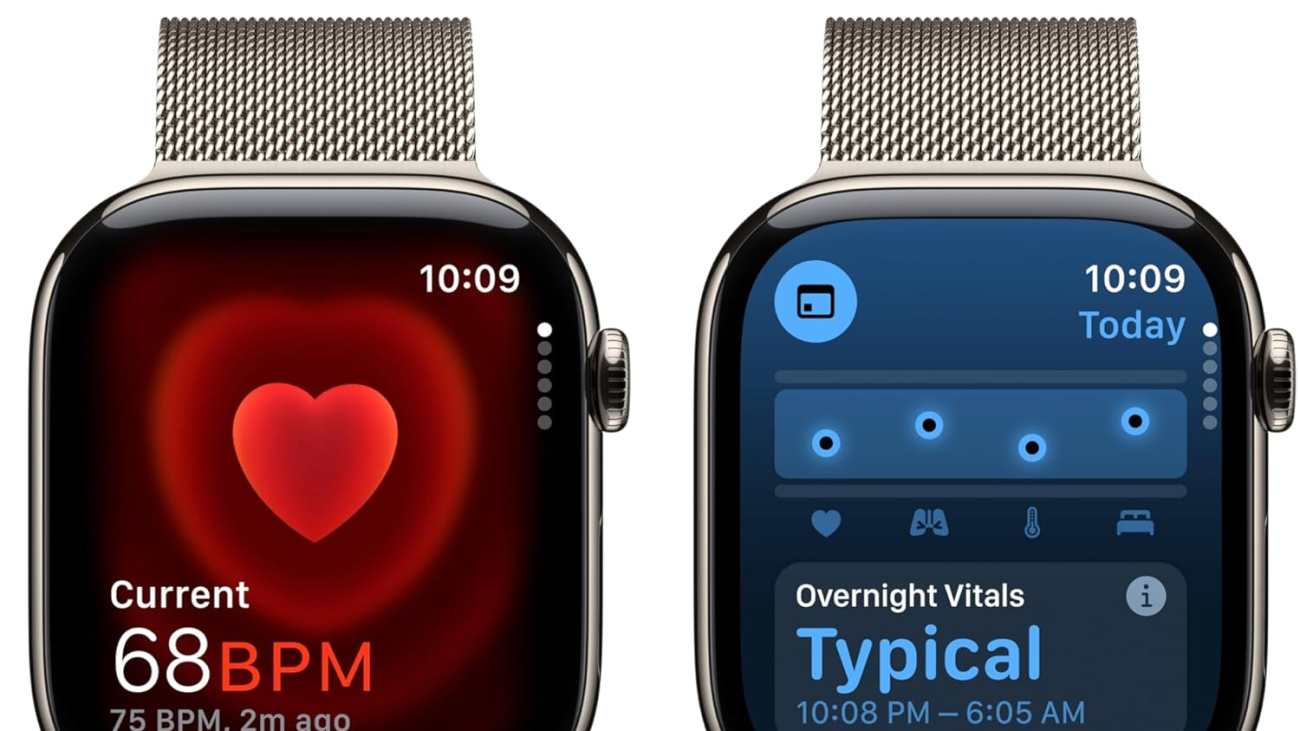
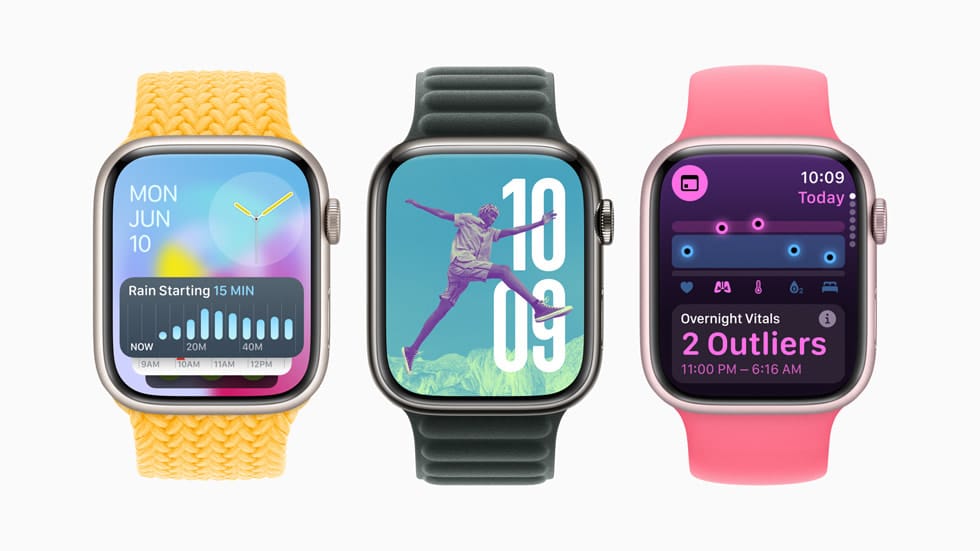
One of the most talked-about features in watchOS 11 is the brand-new Vitals app, which takes health tracking to a whole new level. While you sleep, the app collects important metrics like your heart rate, respiratory rate, wrist temperature, sleep duration, and blood oxygen levels.

What’s great about the Vitals app is its ability to summarize this data in a simple, easy-to-understand format. If any two or more of these health markers are off, you’ll receive a notification with additional details. This means you can get a heads-up on issues ranging from the after-effects of a night out to signs of illness, or even something as subtle as changes in elevation affecting your body.

2. Pregnancy and Cycle Tracking Enhancements

For those logging pregnancies in Apple’s Health app on your iPhone or iPad, watchOS 11 brings some helpful new features. The Cycle Tracking app on Apple Watch now displays gestational age and offers ways to track common pregnancy symptoms, such as nausea.

These updates make it easier for expecting parents to monitor their well-being and understand their body’s changes over time, all from their wrists.

3. Walking Safety and Fall Risk Alerts

Another important upgrade in watchOS 11 is focused on fall prevention. With the newly improved Walking Steadiness feature, users will now be prompted to review high heart rate notifications more quickly, as well as receive faster alerts about potential fall risks.

For those concerned about mobility, this feature provides a little extra peace of mind by helping to prevent accidents before they happen. Whether you’re recovering from an injury or just keeping tabs on your overall stability, these alerts can be a game-changer.

4. Training Load Insights: Smarter Workouts

If you’re someone who loves to track your workouts, Training Load Insights in watchOS 11 is going to become your new favorite tool. This feature lets you monitor the impact of your workouts over time. Each workout is rated on a scale from 1 to 10 based on intensity, making it easier to gauge how hard you’re pushing yourself.

There’s also a new cardio algorithm designed to help you optimize your fitness. This uses key data like your age, height, weight, heart rate, and elevation to tailor a workout regimen that suits your body’s needs. Pair that with your personal feedback on stress and soreness, and watchOS 11 delivers a 28-day training load readout, giving you a clear picture of how your workouts are impacting your body.

This is particularly useful for those training for an event or trying to avoid injury, as it gives you a detailed look at your progress and where you might need to adjust your routine.

5. Customizable Activity Rings and Rest Days

Finally, a feature that gym-goers have been requesting for ages is here: customizable Activity Rings. With watchOS 11, you now have the flexibility to pause your rings for a day, week, or even months, without losing your hard-earned streaks. Whether you’re recovering from an injury or just taking a much-needed break, your Apple Watch will understand.

The ability to take rest days and not feel penalized for it is a fantastic addition, and it’s sure to resonate with anyone who’s ever stressed about keeping their streaks alive while managing their fitness in a realistic way.

Other Exciting Features in watchOS 11

Aside from these major health and fitness updates, watchOS 11 packs a lot more into your Apple Watch experience. Here’s a quick rundown of other cool additions:

  • Smart Stack Widgets: These now come with suggestions based on your schedule and routine.
  • Photos Watch Face: Uses AI to pick your best photos, making your watch look even more personal.
  • Apple’s Check In Feature: Available right from your wrist, including during workouts.
  • Translate App: You can now translate right from your Apple Watch.
  • Apple Maps Hike Feature: Save hikes from U.S. national parks and access them offline directly from your watch.
  • Summarized Notifications: Get notifications forwarded from your iPhone 15 Pro or iPhone 16, powered by Apple Intelligence.
  • Tap to Cash: In the U.S., users can now send and receive Apple Cash directly from their Apple Watch.

A Health-Focused Future

The arrival of watchOS 11 marks another big step in Apple’s journey towards making the Apple Watch a go-to device for health and fitness enthusiasts. With powerful new tools like the Vitals app, Training Load Insights, and the ability to customize your activity goals, this update is designed to help users live healthier lives in a smart, informed way.

If you’re serious about your fitness and health, these new features are worth exploring.


READ ALSO: Epic Games Store and Fortnite Now Available on iPad in the EU

[slick-slider]