Landing Page

Do You Really Need a Professional Landing Page Designer?

Your landing page decides whether a visitor becomes a customer. Therefore, every design choice matters. Many business owners wonder if hiring a professional is worth the cost. Let’s examine the facts.

What Does a Landing Page Designer Actually Do?

A landing page designer builds pages that drive one specific action. That action might be a purchase, a sign-up, or a download. Moreover, the designer combines layout, copy, and user psychology.

A professional also studies your audience. As a result, the page speaks directly to visitor needs. In addition, the designer tests each element to improve results.

Why Landing Page Design Affects Your Conversion Rate

Visitors judge a page within seconds. Consequently, a weak design pushes them away fast. A clear layout, on the other hand, guides them toward action.

Poor pages often share common flaws. For example, they include cluttered layouts, vague headlines, and hidden buttons. Furthermore, slow load times drive users away before they read a word.

Better design raises conversion rates. Thus, every visitor you pay to attract becomes more valuable.

Can You Build a Landing Page Yourself?

Yes, you can. Today, drag-and-drop builders make the process simple. Tools like these offer ready-made templates for quick launches.

However, templates have limits. They rarely match your brand perfectly. Besides, they cannot fix weak messaging or poor strategy.

DIY works well in certain cases. For instance, it suits small budgets, quick tests, and simple offers. Still, you should know when to upgrade.

Signs You Need a Professional Landing Page Designer

Some situations call for expert help. Consider hiring a professional if you notice these signs:

  • Your ad spend is high, but conversions stay low.
  • Your bounce rate keeps climbing.
  • Your page looks like every competitor’s page.
  • You lack time to test and refine.
  • Your offer is complex and needs careful explanation.

In these cases, professional skills pay for themselves. Meanwhile, wasted ad budget keeps draining your profit.

Benefits of Hiring a Professional Landing Page Designer

Stronger Brand Identity

A designer aligns the page with your brand. Consequently, visitors recognize and trust your business. Trust, after all, drives most buying decisions.

Conversion-Focused Copy and Layout

Professionals know where to place each element. They position headlines, images, and buttons with purpose. Likewise, they write persuasive copy that addresses objections.

Mobile-Friendly Performance

Most traffic now comes from phones. Therefore, your page must load fast and look great on small screens. A skilled designer ensures this from the start.

Data-Driven Optimization

Experts run A/B tests on headlines, images, and calls to action. Then they apply the winning results. Over time, this process steadily lifts your conversion rate.

Time Savings

Building a high-converting page takes skill and time. Instead of learning everything yourself, you can focus on running your business. Meanwhile, the designer handles the details.

How Much Does a Landing Page Designer Cost?

Prices vary widely. Freelancers may charge less, while agencies typically charge more. Project scope, revenue goals, and experience all affect the final price.

Still, think about return on investment. A page that doubles your conversions can quickly recoup its cost. In short, view the fee as an investment rather than an expense.

How to Choose the Right Landing Page Designer

Not every designer delivers equal quality. Therefore, evaluate candidates carefully. Follow these steps:

  1. Review their portfolio. Look for clean, persuasive pages.
  2. Check case studies. Prefer designers who show measurable results.
  3. Ask about their process. Good designers discuss research, testing, and strategy.
  4. Confirm SEO knowledge. Your page should also rank well in search.
  5. Read client reviews. Honest feedback reveals reliability.

DIY vs. Professional: A Quick Comparison

FactorDIY BuilderProfessional Designer
CostLow upfrontHigher upfront
SpeedFast for simple pagesModerate, with a planned process
CustomizationLimitedFully tailored
Conversion strategyBasicResearch-backed
Testing and optimizationManualBuilt into the process

Is a Professional Landing Page Designer Worth It?

It depends on your goals. If you run a small test, a template may be enough. However, if you invest heavily in ads or aim to scale, a professional is the smarter choice.

Ultimately, your landing page is your hardest-working salesperson. It works around the clock. So, give it the expertise it deserves.

Ready to turn more visitors into customers? Start by auditing your current page. Then decide whether professional help can unlock better results.

website design agency

Hire a Website Design Agency or Build a Site Yourself?

Your website is often the first thing customers see. Therefore, this decision shapes your brand, your leads, and your growth. Some owners build their own site. Others hire a website design agency. Both routes work, but each suits different needs.

Why Your Website Choice Matters

Your website acts as a digital storefront. Visitors judge your credibility within seconds. Moreover, search engines reward fast, professional sites.

A weak site costs you leads. In contrast, a strong one builds trust and drives sales. Consequently, weigh this choice carefully.

Pros and Cons of Building Your Own Website

Platforms like Wix, Squarespace, and WordPress make setup easy. Additionally, they offer drag-and-drop tools and ready-made templates.

Benefits of a DIY Website

  • Lower upfront cost. You pay only for hosting, a domain, and a template.
  • Full control. You change any detail whenever you like.
  • Quick launch. A simple site can go live in a weekend.

Drawbacks of a DIY Website

  • Time drain. A polished build takes hours you could spend on sales.
  • Generic look. Templates appear bland without a trained eye.
  • Weak SEO. Beginners often miss technical details that affect rankings.
  • Security risks. Outdated plugins invite hackers.

Furthermore, clumsy layouts push visitors away. As a result, they may never return.

Pros and Cons of Hiring a Website Design Agency

A professional website design agency brings a full team. Besides that, you gain designers, developers, and SEO specialists in one place.

Benefits of Working with an Agency

  • Custom design. Your site reflects your brand, not a template.
  • Technical expertise. Experts handle speed, security, and mobile responsiveness.
  • Built-in SEO. Structured pages help search engines read your content.
  • Time savings. You run your business while the agency handles the build.
  • Ongoing support. Most agencies offer maintenance and quick fixes.

Drawbacks of Working with an Agency

  • Higher cost. Professional projects cost more than DIY tools.
  • Longer timeline. Custom work can take several weeks.
  • Communication needs. You must share clear goals and timely feedback.

Nevertheless, a clear contract solves most of these issues.

Key Factors to Consider Before You Decide

Every business has different needs. Therefore, ask yourself a few honest questions.

1. What Is Your Budget?

Startups with tight budgets often begin with DIY. However, cheap now can become expensive later. Fixing a poor site costs more than building it well once.

2. How Complex Is Your Website?

A simple portfolio suits a DIY approach. On the other hand, online stores and booking systems need expert skills. Complex features break easily without proper development.

3. How Much Time Do You Have?

Building a site takes longer than most people expect. Similarly, learning new tools slows you down. If time is scarce, hire a website design agency.

4. What Are Your Long-Term Goals?

Plan for growth from day one. An agency builds a foundation that scales. Meanwhile, a DIY site may need a full rebuild later.

When Building Your Own Website Makes Sense

DIY works well in certain cases. For example, choose it if you:

  • Run a hobby project or personal blog.
  • Need a temporary site to test an idea.
  • Have a very limited budget.

In these cases, a simple template does the job. Later, you can upgrade as revenue grows.

When a Website Design Agency Is the Smarter Move

Professional help pays off in other scenarios. Specifically, hire an agency if you:

  • Sell products or services online.
  • Compete in a crowded industry.
  • Need strong search engine visibility.
  • Want a unique, memorable brand presence.
  • Lack time to manage a build.

Also, established businesses benefit most. Their customers expect a seamless, trustworthy experience.

A Middle Path: The Hybrid Approach

You do not have to choose one extreme. Instead, combine both options. For instance, let an agency build the core structure. Then, update text and images yourself.

Alternatively, buy a premium template and hire a freelancer to customize it. This method balances cost and quality.

How to Choose the Right Website Design Agency

If you decide to hire, choose carefully. First, review portfolios and check real client results. Next, read testimonials and confirm experience in your industry.

Then, ask about SEO, mobile design, and page speed. After that, request a written quote with clear deliverables. Finally, confirm you will own your site and all its files.

Which Option Is Best for You?

No single answer fits everyone. Ultimately, your budget, goals, and time should guide the decision. A DIY site works for simple, low-risk projects. Conversely, a website design agency serves businesses that depend on their online image.

Think of your website as an investment, not an expense. Therefore, choose the option that supports your growth. If you feel unsure, start small and upgrade later.

amazon fire hd 8 kids tablet

The Best Amazon Fire HD 8 Kids Tablets: Top 5 Compared for 2026

amazon fire hd 8 kids tablet

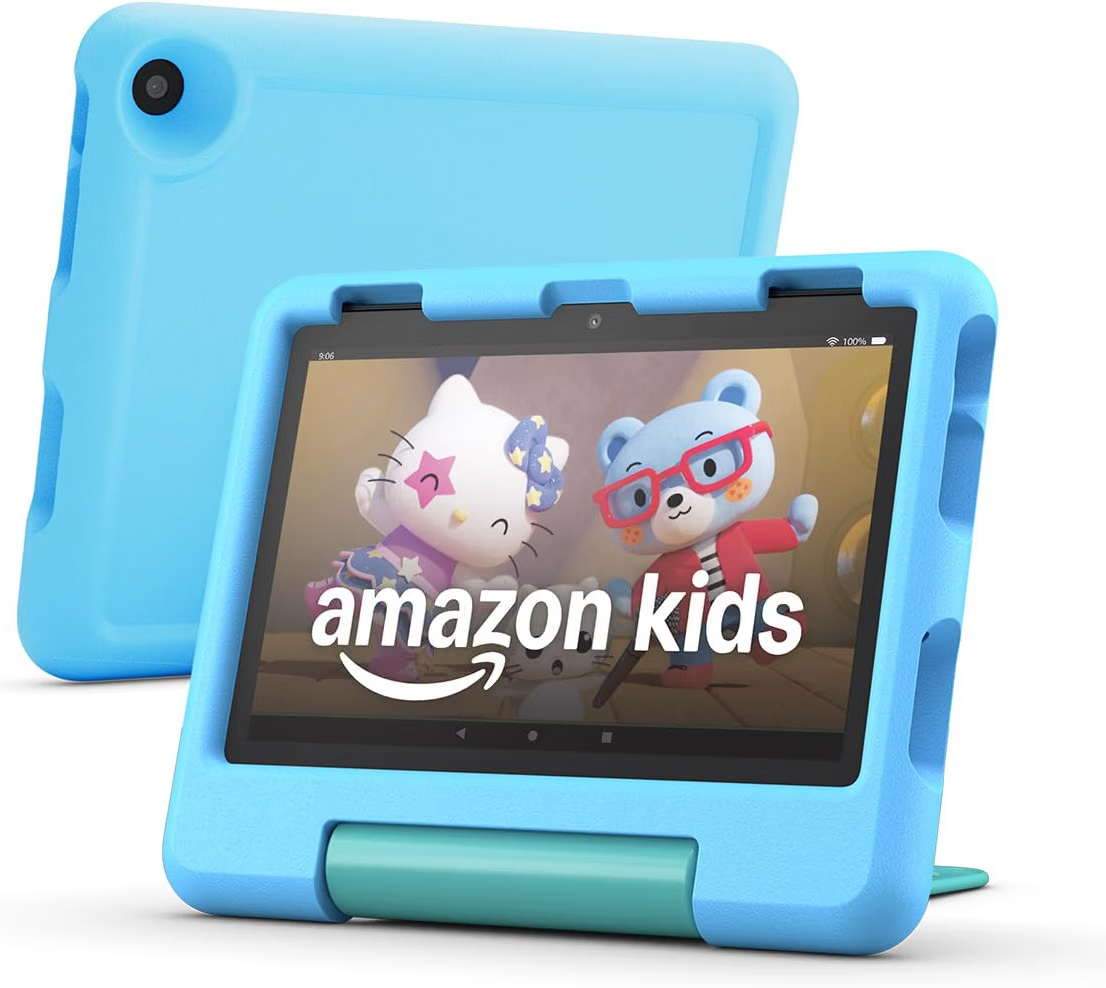
Shopping for a kids’ tablet on Amazon can feel like scrolling through an endless wall of near-identical listings, same case, different color, slightly different storage, and a price that seems to change every time you refresh the page. The Fire HD 8 Kids line is Amazon’s own answer to “give my kid a tablet without giving my kid my tablet,” and it comes in two families: the standard Fire HD 8 Kids (built for ages 3–7, with a chunky foam bumper case) and the Fire HD 8 Kids Pro (built for ages 6–12, with a slimmer, more grown-up case).

Below, we’ve rounded up five of the top-selling, top-rated Fire HD 8 Kids listings on Amazon, spanning both families and several colorways and broken down what each one actually offers, where it shines, and where it falls short. Every model shares the same core hardware DNA (8″ HD display, hexa-core processor, up to 13 hours of battery life, 2-year worry-free guarantee), so the real differences come down to age-fit, case design, storage, and color.

Quick Comparison Table

Product Name (as listed on Amazon)Typical Amazon Star RatingTypical Amazon Price
Amazon Fire HD 8 Kids tablet, 32GB, Blue (ages 3–7)~4.6–4.7 (tens of thousands of ratings)~$95–$150
Amazon Fire HD 8 Kids tablet, 64GB, Blue, newest model (ages 3–7)~4.6–4.7~$110–$160
Amazon Fire HD 8 Kids tablet, 32GB, Disney Princess (ages 3–7)~4.6–4.7~$100–$155
Amazon Fire HD 8 Kids Pro tablet, 32GB, Hello Teal (ages 6–12)~4.6–4.8~$95–$150
Amazon Fire HD 8 Kids Pro tablet, 32GB, Rainbow Universe (ages 6–12)~4.6–4.8~$95–$150

Prices and ratings fluctuate with Amazon’s frequent promotions (Prime Day, Black Friday, Spring Sale); always check the live listing.


1. Amazon Fire HD 8 Kids Tablet, 32GB, Blue (Ages 3–7)

View on Amazon

Amazon Product Specifications

  • Display: 8″ HD (1280 x 800)
  • RAM: 2 GB
  • Storage: 32 GB (expandable up to 1 TB via microSD)
  • Processor: Hexa-core, up to 30% faster than the prior generation
  • Battery: Up to 13 hours
  • Included: Kid-Proof Case with built-in stand/handle, USB-C charging cable, power adapter, 1 year of Amazon Kids+
  • Age range: 3–7

Features Turned Into Benefits

The thick, rubberized Kid-Proof Case isn’t just padding, it means a tablet dropped off a couch, a high chair, or the back seat of a car survives, which translates directly into fewer replacement purchases and less parental anxiety about handing it over. The bundled year of Amazon Kids+ turns the tablet from a blank slate into a ready-to-use library the moment it’s unboxed, so there’s no scrambling to find age-appropriate apps on day one. And because content and app access run through the Amazon Kids+ ecosystem rather than the open web, parents get a genuinely closed environment rather than a stripped-down version of a regular tablet.

Real-World Use Case

For a family with a preschooler who wants to watch the same three shows on repeat during a road trip, this tablet’s case doubles as a stand, so it can prop itself up on a car seat tray without extra accessories, useful shorthand for “entertainment that survives a bumpy drive.”

Pros

  • Sturdy case built specifically for toddlers and preschoolers
  • 2-year worry-free replacement guarantee if it breaks
  • Robust Parent Dashboard for content filters, time limits, and educational goals
  • 13-hour battery comfortably covers a full day out

Cons

  • 2 GB of RAM can feel sluggish with several apps open at once, closing background apps regularly helps
  • No Google Play Store; app selection is limited to the Amazon Appstore, so some popular apps won’t be available, check the Amazon Kids+ catalog for your child’s favorite titles before buying

2. Amazon Fire HD 8 Kids Tablet, 64GB, Blue (Newest Model, Ages 3–7)

View on Amazon

Amazon Product Specifications

  • Display: 8″ HD (1280 x 800)
  • RAM: 2 GB
  • Storage: 64 GB (expandable up to 1 TB)
  • Processor: Hexa-core
  • Battery: Up to 13 hours
  • Included: Kid-Proof Case, charging cable, power adapter, 1 year of Amazon Kids+
  • Age range: 3–7

Features Turned Into Benefits

This is essentially the same tablet as the 32GB Blue model above, but with double the on-device storage. For a family that downloads a lot of shows for offline flights or car rides, rather than streaming everything live, the extra 32 GB means fewer “delete something to make room” prompts and less need to rely on a microSD card at all.

Real-World Use Case

A family planning a long flight can pre-download several movies, a season of a show, and a handful of games without worrying about running out of space mid-download, handy shorthand for “set it and forget it” before a trip.

Pros

  • Same durable case and 2-year guarantee as the 32GB version
  • Extra storage reduces reliance on microSD expansion
  • Same all-day battery life
  • Straightforward setup through the Parent Dashboard app

Cons

  • The storage bump adds to the price versus the 32GB model, so it’s worth deciding whether your child actually downloads enough content to need it
  • Same RAM ceiling as the 32GB version, so heavier multitasking still isn’t its strong suit

3. Amazon Fire HD 8 Kids Tablet, 32GB, Disney Princess Edition (Ages 3–7)

View on Amazon

Amazon Product Specifications

  • Display: 8″ HD (1280 x 800)
  • RAM: 2 GB
  • Storage: 32 GB (expandable up to 1 TB)
  • Processor: Hexa-core
  • Battery: Up to 13 hours
  • Included: Themed Kid-Proof Case, charging cable, power adapter, 1 year of Amazon Kids+
  • Age range: 3–7

Features Turned Into Benefits

Hardware-wise, this is identical to the standard Blue model, the difference is entirely in the themed case design. For families whose child has a strong character preference, a themed case can make the tablet feel like “their” device rather than a shared gadget, which in practice can mean less fighting over whose tablet is whose in a multi-kid household.

Real-World Use Case

In a household with siblings sharing devices, giving each child a differently themed edition (Disney Princess, Disney Pixar Cars, etc.) makes it easy to tell tablets apart at a glance, no labels or stickers needed.

Pros

  • Fun, recognizable design that appeals directly to younger kids
  • Identical durability and guarantee to the standard model
  • Full access to the same Amazon Kids+ content library
  • Good gifting option for birthdays

Cons

  • Character-themed editions can sell out or rotate seasonally, so availability varies, have a backup color in mind
  • No functional upgrade over the plain-color version, so you’re paying for design, not performance

4. Amazon Fire HD 8 Kids Pro Tablet, 32GB, Hello Teal (Ages 6–12)

View on Amazon

Amazon Product Specifications

  • Display: 8″ HD (1280 x 800), strengthened aluminosilicate glass
  • RAM: 3 GB
  • Storage: 32 GB (expandable up to 1 TB)
  • Processor: Hexa-core
  • Battery: Up to 13 hours
  • Included: Slim Kid-Friendly Case with adjustable stand, charging cable, power adapter, 1 year of Amazon Kids+
  • Age range: 6–12

Features Turned Into Benefits

The Kids Pro line trades the bulky foam bumper for a slimmer case built for kids who no longer need (or want) something that looks like a toy. The extra 1 GB of RAM over the standard Kids model helps apps and browsing feel noticeably snappier, which matters more for older kids running homework apps or slightly heavier games. The adjustable stand built into the case also means hands-free video calls or recipe-following without extra accessories.

Real-World Use Case

A 9-year-old using the tablet for a school reading app alongside a couple of casual games will notice less lag switching between them compared to the 2 GB standard model, a small but real quality-of-life difference for daily use.

Pros

  • Slimmer, more mature case design that older kids are less likely to be embarrassed by
  • Strengthened glass screen adds durability without the bulky bumper
  • Noticeably smoother multitasking thanks to the extra RAM
  • Same 2-year worry-free guarantee and Parent Dashboard controls as the standard line

Cons

  • Amazon Appstore’s app catalog is still smaller than Google Play, sideloading the Play Store is technically possible but voids the warranty and can break parental controls, so it’s not something we’d recommend for most families
  • Real-world battery testing tends to land a bit under the advertised 13 hours during heavy gaming (closer to 6–7 hours), so plan charging accordingly on demanding days

5. Amazon Fire HD 8 Kids Pro Tablet, 32GB, Rainbow Universe (Ages 6–12)

Amazon Product Specifications

  • Display: 8″ HD (1280 x 800), strengthened aluminosilicate glass
  • RAM: 3 GB
  • Storage: 32 GB (expandable up to 1 TB)
  • Processor: Hexa-core
  • Battery: Up to 13 hours
  • Included: Slim Kid-Friendly Case, charging cable, power adapter, 1 year of Amazon Kids+
  • Age range: 6–12

Features Turned Into Benefits

Same Pro-line hardware as the Hello Teal model, just in a different colorway. For families who want the mature case design and the RAM bump of the Pro line but a livelier look than teal or blue, this is a straightforward color pick with zero functional trade-off.

Real-World Use Case

For an older sibling who wants their tablet to look visibly different from a younger sibling’s standard Fire HD 8 Kids tablet, choosing a distinct Pro colorway like Rainbow Universe makes ownership obvious without needing a case swap.

Pros

  • Identical performance and durability to the Hello Teal Pro model
  • Distinct look that’s easy to tell apart from a sibling’s tablet
  • Same 2-year guarantee and full Amazon Kids+ library access
  • Slim case works well for backpacks and school bags

Cons

  • Colorway availability and discount depth can vary by sale event, so pricing may differ slightly from other Pro colors at any given time
  • Shares the same Appstore limitations and real-world battery caveats as the Hello Teal version

Analysis: Which Fire HD 8 Kids Tablet Fits Which Family?

The single biggest decision point isn’t color, it’s age and case style. If your child is under 7, the standard Fire HD 8 Kids line’s thick foam bumper case is worth the slightly bulkier feel; it’s built to survive exactly the kind of drops that come with a toddler’s grip. Once a child hits roughly 6–12 and starts caring about how “babyish” their gadgets look, the Fire HD 8 Kids Pro line’s slimmer case and extra RAM make daily use noticeably smoother, at a similar price point.

Storage matters most for families who download content instead of streaming it, frequent flyers, road-trippers, or households with unreliable Wi-Fi. Everyone else can generally get by on 32 GB, especially since every model supports microSD expansion up to 1 TB.

Color and character editions are purely cosmetic. They’re a reasonable way to reduce sibling squabbling over whose tablet is whose, but they don’t change performance, battery life, or durability.

All five of these Fire HD 8 Kids tablets share the same core strengths that make the line a consistently popular pick on Amazon: a genuinely kid-proof or kid-friendly case, a 2-year no-questions replacement guarantee, robust parental controls, and a full year of ad-free content included in the box. The 32GB Blue Fire HD 8 Kids and Disney Princess edition are best suited to younger children who need maximum drop protection, the 64GB Blue model is worth the upgrade for families that download a lot of offline content, and the Hello Teal and Rainbow Universe Kids Pro tablets are the better fit once a child outgrows the bulkier toddler case and wants something that feels a bit more grown-up. Compare the specs and current Amazon pricing for each above to find the closest match for your child’s age and how the tablet will actually be used day to day.


READ ALSO: Best Tablets for Kids: Safe, Durable, and Fun Devices

[slick-slider]
supersonic kids tablet

Supersonic Kids Tablet: What Parents Should Know

supersonic kids tablet

Choosing the right supersonic kids tablet feels overwhelming today. The market offers dozens of options. However, not every device suits a young user. Therefore, parents need clear guidance before buying. This article breaks down what truly matters.

Why a Supersonic Kids Tablet Works Well for Children

A supersonic kids tablet offers flexibility that many parents appreciate. For instance, it supports a wide range of educational apps. Additionally, prices vary greatly across models. As a result, families can find an option that fits any budget. Meanwhile, its parental control tools continue improving each year.

Most importantly, a supersonic kids tablet adapts to different age groups. A toddler needs simple, durable hardware. A pre-teen, on the other hand, wants more storage and speed. Consequently, this broad product range covers both needs comfortably.

Key Features to Look For in a Supersonic Kids Tablet

Screen durability matters most for younger children. Kids drop devices often, so shock resistance counts. Look for a supersonic kids tablet with a rubberized case or built-in bumpers. Furthermore, a scratch-resistant screen extends the device’s lifespan significantly.

Battery life also plays a crucial role. Long car rides and travel days demand reliable power. Ideally, choose a supersonic kids tablet that lasts eight hours or more. Otherwise, you’ll face constant charging interruptions during outings.

Parental controls deserve close attention too. Built-in family management tools let you manage screen time remotely. You can also filter content, block apps, and monitor activity. This feature alone can prevent countless headaches down the road.

Storage capacity shouldn’t be overlooked either. Apps, games, and videos consume space quickly. Therefore, pick a supersonic kids tablet with at least 32GB of storage. Expandable microSD support adds even more flexibility later.

Top Considerations by Age Group

Toddlers, aged two to four, need simplicity above all. A basic interface with large icons works best on a supersonic kids tablet. Bright colors and sturdy cases also help at this stage. Meanwhile, screen time limits should stay strict and consistent.

School-age kids, roughly five to ten, benefit from more advanced features. Educational apps become increasingly important here. Consequently, look for a supersonic kids tablet with app curation tools built in. Some bundles even include subscriptions with pre-loaded learning content.

Pre-teens, ages eleven and up, often want a tablet similar to an adult device. Faster processors and better cameras matter more now. Nevertheless, parental oversight remains essential during this transition period.

What Sets a Supersonic Kids Tablet Apart

A well-built supersonic kids tablet stands out through its balance of durability, speed, and safety features. Many bundles include a protective case, a warranty, and pre-loaded kid-friendly software. This combination reduces the guesswork parents usually face when comparing devices.

Storage, display quality, and battery life vary between bundles. Consequently, comparing specs side by side helps narrow the choice. Some packages emphasize content curation and screen-time guarantees. Others focus on raw performance for older, more demanding users.

Ultimately, your choice depends on your family’s specific priorities. Budget-conscious parents may prioritize affordability first. Families that value strict content control might lean toward a curated supersonic kids tablet bundle instead. Those needing top performance could choose a higher-spec configuration.

Setting Up Safe Usage Habits

Buying the right supersonic kids tablet solves only half the problem. Establishing healthy usage habits matters just as much. Set clear daily time limits from the start. Additionally, designate tech-free zones like bedrooms or dinner tables.

Review app permissions regularly as your child grows. What suited a six-year-old may not suit a nine-year-old. Consequently, revisit parental control settings every few months. This ongoing adjustment keeps the experience age-appropriate.

Encourage a balance between screen time and other activities. Outdoor play, reading, and family time remain irreplaceable. A supersonic kids tablet should complement childhood, not replace it entirely.

Final Thoughts for Parents

Selecting the best supersonic kids tablet requires balancing several factors. Durability, battery life, storage, and parental controls all matter significantly. Meanwhile, age-appropriate features ensure the device grows alongside your child.

No single supersonic kids tablet suits every family perfectly. Nevertheless, understanding these core criteria simplifies the decision considerably. Take time to compare models against your specific needs. Your child’s safety, learning, and enjoyment depend on that careful choice.


READ ALSO: Best Tablets for Kids: Safe, Durable, and Fun Devices

[slick-slider]
Android Tablet for Kids

iPad vs. Android Tablet for Kids: Which Should You Choose?

Android Tablet for Kids

Choosing a tablet for your child is not a small decision. It shapes how they play, learn, and explore technology. Two names dominate this market: Apple’s iPad and the wide range of Android tablets. Each option offers real strengths. However, the right pick depends on your budget, your family’s existing devices, and your child’s age.

This guide breaks down the key differences. As a result, you can make a confident, informed choice.

Build Quality and Durability

Kids drop things. Therefore, durability matters more than almost any other factor.

iPads use premium materials and consistently strong build quality across models. Even the budget iPad performs reliably for years. Screens resist scratches well, and the hardware feels solid in small hands.

Android tablets vary widely. Some brands, like Samsung and Lenovo, build sturdy devices. Others cut corners to hit lower price points. Consequently, research matters a lot here. Look for models with reinforced corners or bundled protective cases designed specifically for children.

Parental Controls and Safety Features

Safety features often decide this debate for many parents.

Apple’s Screen Time tool is deeply integrated into iOS. It lets you set app limits, filter content, and schedule downtime with minimal setup. Additionally, Apple’s ecosystem keeps these settings consistent across every Apple device your family owns.

Android counters with Google’s Family Link. This app also offers strong controls, including app approval, screen time limits, and location tracking. Meanwhile, several Android tablets—especially those from Amazon and Samsung—include dedicated “kids mode” interfaces. These modes wall off adult content automatically. Thus, both platforms handle safety well, though Apple’s system feels slightly more polished.

App Selection and Educational Content

Educational apps drive much of a tablet’s value for young users.

The App Store maintains strict review standards. Therefore, iPad users often find higher-quality, well-designed educational apps. Many top-tier learning platforms launch on iOS first.

Google Play, on the other hand, offers a larger overall app library. However, quality varies more. Fortunately, Google Play’s dedicated “Kids” section curates age-appropriate, teacher-reviewed content. This makes finding safe apps much easier than browsing the full store.

Price and Value for Money

Budget often settles this decision quickly.

iPads sit at a premium price point, even the entry-level models. That said, their long software support lifespan adds value over time. Many iPads receive updates for five years or more.

Android tablets span every price range. Budget options from Amazon or Lenovo cost a fraction of an iPad. Consequently, families can buy a device for younger kids without worrying much about breakage. However, cheaper Android tablets often stop receiving updates sooner, which shortens their useful life.

Ecosystem and Compatibility

Your existing tech setup matters too.

If your family already uses iPhones or MacBooks, an iPad integrates seamlessly. Photos, messages, and files sync automatically through iCloud. Similarly, features like AirDrop and Handoff simplify daily use.

Conversely, if your household relies on Android phones or Chromebooks, an Android tablet fits more naturally. Google Drive, Gmail, and Chrome sync effortlessly across devices. Therefore, matching your child’s tablet to your family’s existing ecosystem saves considerable hassle.

Screen Time Tools for Different Age Groups

Younger children need simpler, more restrictive environments. Older kids need flexibility alongside safety.

For toddlers and early elementary students, Amazon Fire Kids tablets or basic Android kids’ editions work well. These devices launch directly into a locked, colorful interface. Meanwhile, older children benefit from the broader app ecosystems that both iPad and premium Android tablets provide.

Ultimately, matching the device to your child’s developmental stage improves the experience for everyone.

Battery Life and Everyday Usability

Long battery life prevents mid-activity meltdowns.

iPads typically deliver excellent, consistent battery performance across the lineup. Android battery life varies by manufacturer and price tier. Premium Android tablets often match or exceed iPad performance. Budget models, however, may fall short during heavy use.

Final Verdict: Which Should You Choose?

There is no universal answer here. Instead, the right choice depends on your priorities.

Choose an iPad if you want top-tier build quality, polished parental controls, and long-term software support—and you don’t mind paying more upfront.

Choose an Android tablet if you want flexible pricing, a device tailored to your child’s exact age, and easy integration with an existing Android household.

Whichever you choose, pair the device with a solid protective case and clear screen-time rules. That combination matters more than the brand printed on the box.


READ ALSO: Best Tablets for Kids: Safe, Durable, and Fun Devices

[slick-slider]
kids tablet

Best Tablets for Kids: Safe, Durable, and Fun Devices

kids tablet

Choosing a tablet for your child can feel overwhelming. Options flood the market every year. However, not every device fits a child’s needs. Therefore, parents must weigh durability, safety features, and educational value before buying. This guide breaks down what truly matters when picking the best tablets for kids.

Why Kids Need a Different Kind of Tablet

Children are rough on electronics. Standard tablets rarely survive daily drops and spills. Kid-focused tablets solve this problem. They include reinforced cases, shatterproof screens, and simplified interfaces. Additionally, they offer parental controls that adult tablets often lack. As a result, parents gain peace of mind while kids explore safely.

Key Features to Look For

Not all kids’ tablets are equal. Some prioritize entertainment. Others focus on learning. Still, certain features remain essential across the board.

Durability matters most. Look for rubberized bumpers and drop protection ratings. Meanwhile, screen quality should resist scratches from small fingers.

Parental controls come next. Good tablets let you set screen time limits. They also allow content filtering by age group. Furthermore, some models include activity reports so you can track usage.

Battery life deserves attention too. Long car rides and quiet afternoons demand hours of uninterrupted play. Consequently, a weak battery quickly becomes frustrating.

Educational content rounds out the list. The best devices come preloaded with age-appropriate apps, books, and games. Thus, screen time doubles as learning time.

Top Picks for Different Age Groups

Every child has unique needs based on age. Therefore, matching the tablet to the right stage makes a real difference.

Toddlers (Ages 2–4)

Toddlers need simplicity above all. Large icons and one-touch navigation work best. Moreover, tablets built for this age group often skip web browsers entirely. This prevents accidental access to inappropriate content. Look for models with soft, chewable edges and extra-thick cases. Screen brightness controls also protect young eyes.

Amazon pick: The Amazon Fire 7 Kids Tablet fits this age group well. It ships with a thick, toddler-proof case, a two-year worry-free guarantee, and a full year of Amazon Kids+ content included. Its compact 7-inch screen and simple interface suit small hands and short attention spans.

Young Children (Ages 5–8)

At this stage, kids start reading and problem-solving independently. Tablets should support this growth. Look for devices with built-in learning apps covering math, reading, and science. Meanwhile, parental dashboards become more important. Parents can now approve specific apps and monitor progress remotely.

Amazon pick: The Amazon Fire HD 8 Kids Tablet works well here. It offers a sharper 8-inch HD display, expandable storage, and a rugged kid-proof case. Parental controls let you set daily limits and approve new apps, making it a solid fit as reading and schoolwork ramp up.

Older Kids (Ages 9–12)

Older children want more freedom and functionality. Consequently, tablets for this age group resemble standard devices more closely. However, safety features remain critical. Look for social media restrictions and app-download approval systems. Additionally, better processors support gaming and video calls with friends or family.

Amazon pick: The Amazon Fire HD 10 Kids Pro Tablet suits this age range best. Its larger 10-inch screen, faster processor, and more grown-up interface handle gaming, video calls, and homework with ease. Its parental dashboard scales down restrictions gradually, giving older kids more independence while parents stay in control.

Balancing Fun and Learning

Screen time sparks debate among parents. Nevertheless, the right tablet can turn passive scrolling into active learning. Many devices now include coding games, creative drawing tools, and interactive storybooks. As a result, children build skills while having fun. Setting daily limits still helps maintain balance. Combining screen time with outdoor play and reading keeps development well-rounded.

Budget Considerations

Price ranges vary widely. Entry-level tablets cost less but may sacrifice durability or storage. Premium options offer better cameras, faster processors, and longer warranties. Therefore, consider how often your child will use the device. A daily-use tablet justifies a higher investment. Meanwhile, occasional use may only require a basic model.

Storage and Connectivity

Storage space fills up quickly with apps, games, and videos. Consequently, choose a tablet with expandable storage options. A microSD slot adds flexibility without extra cost. Wi-Fi connectivity suffices for most households. However, some parents prefer cellular models for tracking location during outings.

Safety Beyond the Screen

Physical safety matters just as much as digital safety. Look for tablets certified free of harmful chemicals. Additionally, check for rounded edges and lightweight designs. Kids carry these devices everywhere. Therefore, comfort and portability count too.

Final Thoughts on Choosing the Best Tablet

Selecting the best tablet for your child comes down to balance. Durability protects your investment. Parental controls protect your child. Meanwhile, educational content turns screen time into growth time. Ultimately, the right choice depends on your child’s age, habits, and your family’s priorities. With careful research, you can find a device that entertains, educates, and lasts.


READ ALSO: ASUS Zenbook 14 Laptop (2026) Review: OLED Performance for Designers and Professionals

[slick-slider]
ASUS Zenbook 14

ASUS Zenbook 14 Laptop (2026) Review: OLED Performance for Designers and Professionals

ASUS Zenbook 14

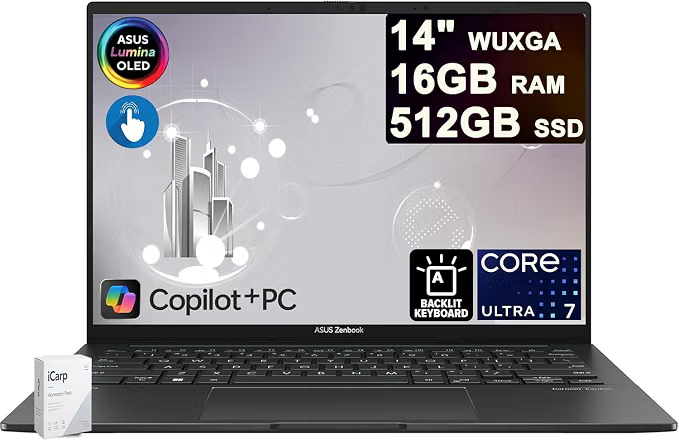
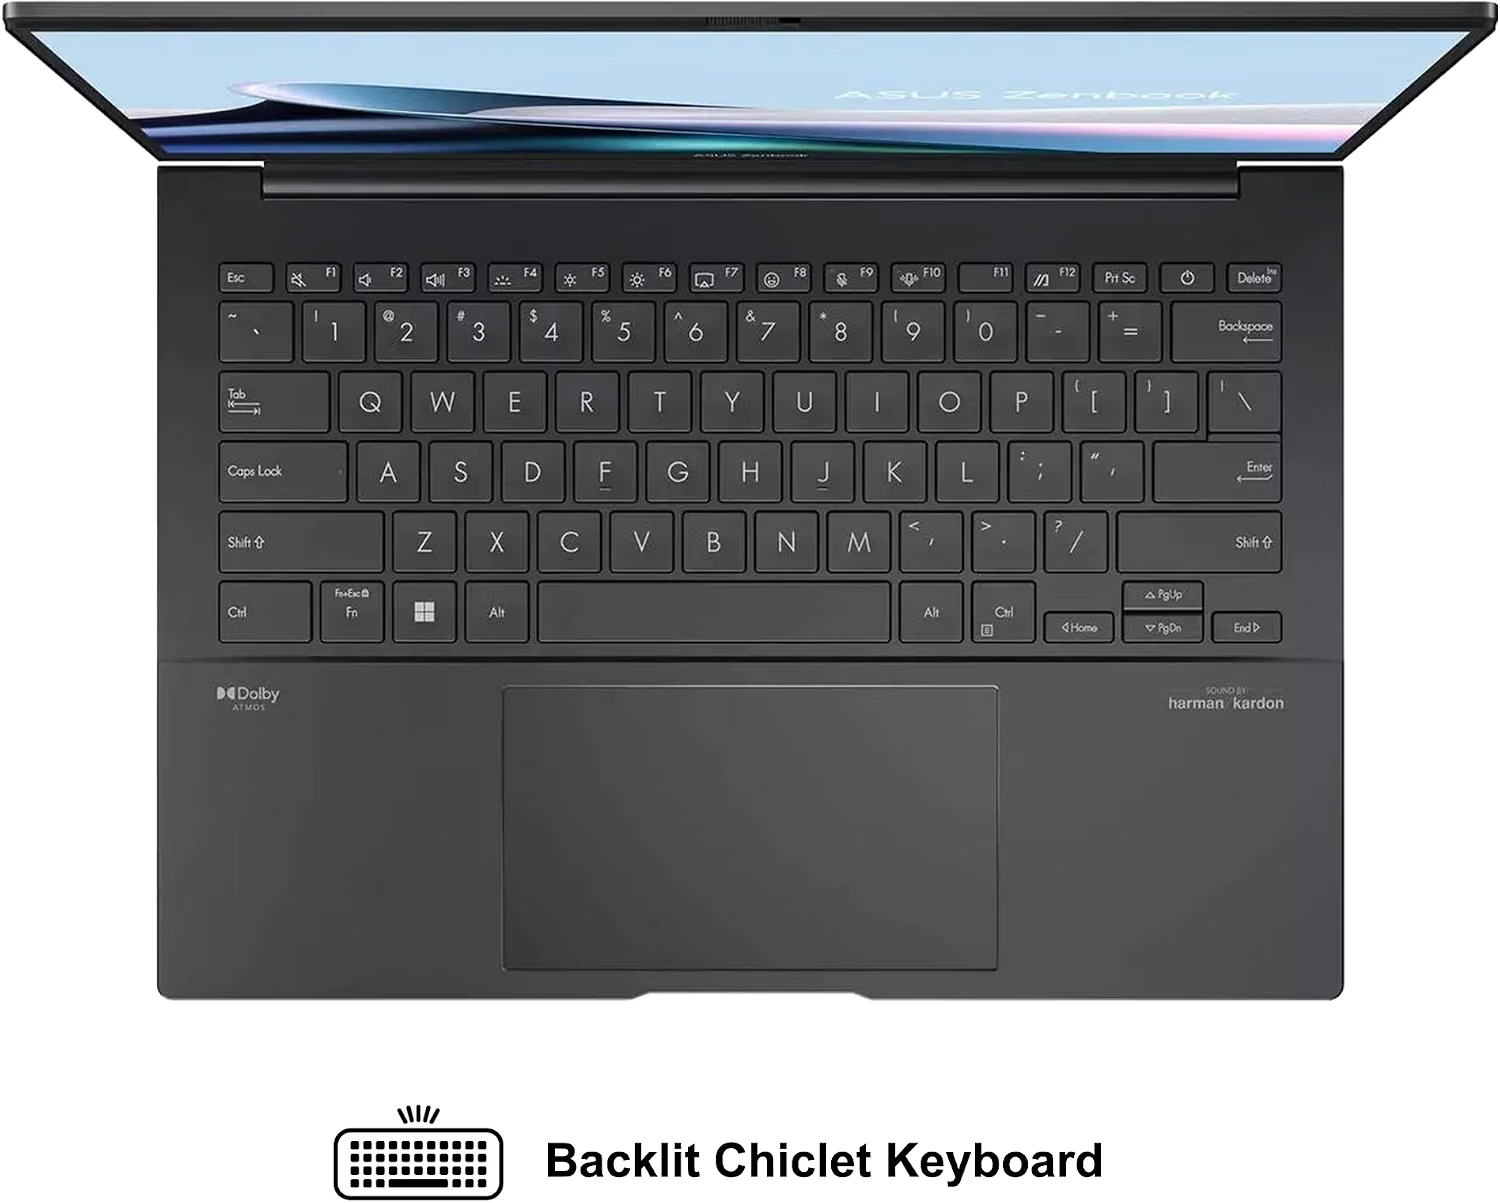
The ASUS Zenbook 14 Laptop 14″ WUXGA OLED Touch is designed for users who want a combination of premium display quality, strong processing performance, portability, and professional productivity. With an Intel Core Ultra 7 255H processor, 16GB RAM, 512GB SSD, and a 14-inch OLED touchscreen, it is particularly appealing to designers, business professionals, content creators, and students who need a capable laptop for demanding everyday workloads.

ASUS Zenbook 14 at a Glance

FeatureSpecification
Display14-inch WUXGA OLED touchscreen
Resolution1920 × 1200
BrightnessUp to 500 nits HDR
Colour100% DCI-P3
ProcessorIntel Core Ultra 7 255H, 16-core
Memory16GB RAM
Storage512GB SSD
Operating SystemWindows 11
Best ForDesigners, professionals, creators and business users

1. OLED Touchscreen for Creative Work

One of the biggest attractions of this Zenbook 14 configuration is its 14-inch WUXGA OLED touchscreen. OLED technology can provide deep blacks, excellent contrast, and vibrant colours, making it particularly useful for people working with photographs, graphics, videos, presentations, and other visual content.

The advertised 100% DCI-P3 colour coverage is another major advantage for creative professionals. A wide colour gamut allows the display to reproduce a broader range of colours than conventional displays, which can make visual work more immersive.

The touchscreen also provides an additional way to interact with Windows 11, especially when navigating creative applications, presentations, or other touch-friendly software.

2. Intel Core Ultra 7 255H Processor

The laptop is equipped with Intel’s Core Ultra 7 255H, a modern high-performance mobile processor with 16 cores. This gives the machine substantial processing capability for multitasking and demanding professional applications.

For a business professional, this can mean comfortably running multiple browser tabs, office applications, communication software, spreadsheets, and other programs simultaneously.

For designers and content creators, the processor can also provide the performance needed for tasks such as photo editing, graphic design, coding, and moderate video-production workflows.

3. 16GB RAM for Multitasking

The included 16GB of RAM provides a useful balance between performance and everyday usability.

You can work with several applications at once without constantly closing programs to free up memory. For example, a designer might have Photoshop, a web browser, email, cloud storage, and a communication application open simultaneously.

However, professionals working with exceptionally large projects, extensive 3D workloads, or very demanding video-production applications may want to consider a configuration with more memory if one is available.

4. 512GB SSD Storage

The 512GB SSD provides considerably faster storage performance than a traditional mechanical hard drive.

This helps with:

  • Faster Windows startup
  • Quicker application launches
  • Faster file access
  • More responsive everyday computing
  • Convenient storage for documents and creative projects

For business users, 512GB should be sufficient for documents, presentations, applications, and general work. Designers who maintain large libraries of RAW photographs, 4K video files, or other large media collections may eventually need an external SSD or cloud storage.

5. Portable Design for Business Professionals

A 14-inch laptop is a practical size for professionals who frequently move between an office, home, client meetings, cafés, and other work locations.

The Zenbook line is known for focusing on portability and premium design, making this type of configuration attractive to professionals who don’t want to carry a bulky workstation everywhere.

The 14-inch form factor also provides a reasonable compromise between screen size and portability.

6. Windows 11 for Modern Productivity

The laptop comes with Windows 11, giving users access to Microsoft’s current desktop operating system and its ecosystem of productivity applications.

This makes the Zenbook suitable for common professional tasks such as:

  • Microsoft Office
  • Web browsing
  • Email
  • Video conferencing
  • Digital marketing
  • SEO
  • Content creation
  • Graphic design
  • Programming
  • Business management

ASUS Zenbook 14 Pros and Cons

Pros

  • Excellent OLED touchscreen
  • 100% DCI-P3 colour coverage
  • 500-nit HDR capability
  • Powerful Intel Core Ultra 7 255H processor
  • 16GB RAM
  • Fast 512GB SSD
  • Portable 14-inch form factor
  • Well suited to business and creative work
  • Windows 11 included

Cons

  • 512GB may feel limited for large media libraries
  • 16GB RAM may not satisfy some advanced professional workloads
  • Integrated graphics configurations may not replace a dedicated GPU workstation for demanding 3D work
  • OLED panels can consume more power during certain workloads

Who Should Buy the ASUS Zenbook 14?

The ASUS Zenbook 14 is particularly attractive for business professionals, designers, digital marketers, writers, developers, students, and content creators who prioritise display quality and portable performance.

It is especially compelling if you spend significant time looking at images, websites, presentations, videos, or other visual content.

For someone who needs a laptop primarily for browsing, documents, email, meetings, and productivity, this configuration offers more display and processing capability than necessary—but that extra performance can provide useful headroom for future workloads.

Who Should Look Elsewhere?

The Zenbook 14 may not be the ideal choice for users whose primary workloads require a powerful dedicated graphics card.

Professional 3D artists, advanced CAD users, high-end video editors, and serious gamers should compare it with laptops featuring dedicated NVIDIA or AMD graphics.

Likewise, users who need extensive local storage may prefer a model with a 1TB or larger SSD.

Final Verdict

The ASUS Zenbook 14 14-inch WUXGA OLED Touch combines a high-quality OLED display with a powerful Intel Core Ultra 7 255H processor, 16GB RAM, and 512GB SSD. Its combination of colour accuracy, portability, touchscreen functionality, and processing performance makes it an appealing option for designers and business professionals.

If your priorities are a premium display, strong multitasking performance, portability, and a professional Windows 11 experience, this Zenbook configuration deserves serious consideration.

Get an Asus Zenbook 14 on Amazon


READ ALSO: Nigerians Chasing Digital Marketing Jobs in 2026: Here’s the Actual Roadmap

[slick-slider]
Digital Marketing Jobs

Nigerians Chasing Digital Marketing Jobs in 2026: Here’s the Actual Roadmap

The demand for digital marketing professionals continues to grow across Nigeria. Businesses now rely heavily on digital channels to attract customers and increase revenue.

However, getting a digital marketing job requires more than knowing how to post on social media. Employers want practical skills, measurable results, and strong communication.

Therefore, aspiring marketers need a clear roadmap. Here is how to build a successful digital marketing career in Nigeria in 2026.

1. Understand What Digital Marketing Involves

Digital marketing covers several specialised areas. These include search engine optimisation, social media marketing, email marketing, content marketing, and paid advertising.

Additionally, marketers increasingly work with analytics, automation, artificial intelligence, and conversion optimisation.

You do not need to master everything immediately. Instead, choose one area and develop strong foundational knowledge.

For example, you could start with SEO, content marketing, or social media management.

2. Learn In-Demand Digital Marketing Skills

Employers increasingly value practical skills over certificates alone. Consequently, focus on skills that businesses can immediately use.

Learn how search engines rank websites and how keyword research works. Understand content creation, website optimisation, and basic analytics.

Also, learn how advertising platforms operate. Google Ads and Meta advertising skills can make your profile more attractive.

Furthermore, develop basic graphic design and copywriting abilities. These skills can strengthen your overall marketing performance.

3. Build Practical Experience

Experience remains one of the biggest challenges for beginners. However, you can create experience without having a full-time job.

Start by creating your own website or blog. Optimise its pages and publish useful content regularly.

You can also help a small business improve its online presence. Offer specific services instead of promising vague marketing support.

For instance, manage social media accounts, improve website SEO, or create email campaigns.

Most importantly, track your results. Numbers make your experience more credible.

4. Create a Strong Digital Marketing Portfolio

A portfolio shows employers what you can actually accomplish. Therefore, build one before applying for numerous jobs.

Include examples of SEO projects, social media campaigns, content pieces, and advertising results.

If you lack client work, create realistic personal projects. Then document your strategy, implementation, and results.

For example, show how you improved website traffic through keyword optimisation.

Also, explain the tools you used and the challenges you encountered.

5. Master Important Marketing Tools

Digital marketers depend on technology every day. Therefore, becoming comfortable with industry tools can improve your employability.

Learn tools such as Google Analytics, Google Search Console, Canva, WordPress, and keyword research platforms.

Additionally, understand email marketing and customer relationship management systems.

AI tools are also becoming increasingly important. Use them to support research, brainstorming, analysis, and content workflows.

However, always review AI-generated content before publishing it.

6. Apply for Digital Marketing Jobs Strategically

Do not send the same CV to every company. Instead, tailor your CV to each position.

Highlight skills that match the job description. Then demonstrate those skills through specific achievements.

For example, mention increased website traffic, improved engagement, or successful campaign results.

Also, search beyond traditional job boards. Explore LinkedIn, company career pages, professional communities, and remote-work platforms.

Networking can also uncover opportunities before companies advertise them publicly.

7. Consider Freelancing and Remote Work

Digital marketing does not always require a traditional office job. Freelancing can provide valuable experience and income.

Start with smaller projects while building your reputation. Then gradually increase your rates as your skills improve.

Remote work also creates opportunities with companies outside Nigeria. Therefore, improve your written communication and professional presentation.

Create profiles on reputable freelance platforms. More importantly, maintain a professional portfolio that demonstrates your capabilities.

8. Keep Learning Throughout 2026

Digital marketing changes quickly. Search algorithms, advertising platforms, AI tools, and consumer behaviour constantly evolve.

Therefore, continuous learning should become part of your career strategy.

Follow respected industry publications and experienced marketers. Take practical courses and experiment with new strategies.

Most importantly, apply what you learn. Practical experimentation helps you develop stronger marketing judgement.

9. Develop Business and Communication Skills

Great digital marketers understand business objectives. They do not simply chase likes, followers, or website visits.

Learn how marketing contributes to sales, leads, customer retention, and revenue.

Additionally, improve your communication skills. You may need to explain marketing strategies to business owners and executives.

Strong presentation skills can therefore separate you from other candidates.

10. Follow a Clear 90-Day Roadmap

Your first month should focus on learning fundamental marketing concepts. Choose one specialisation and study it consistently.

During the second month, create practical projects and build your portfolio. Start documenting measurable outcomes.

Then, use the third month to apply for jobs and pursue freelance opportunities.

Apply consistently, improve your CV, and practise interviews. Meanwhile, continue developing your technical skills.

Getting a digital marketing job in Nigeria in 2026 is achievable with the right strategy.

However, certificates alone will not guarantee employment. You need practical skills, demonstrable experience, and a strong portfolio.

Start with one specialisation, build real projects, and measure your results. Then, apply strategically while continuously improving your skills.

With consistency and patience, your digital marketing career can move from learning to earning.

WinsPad20

How Do I Install Touchscreen Drivers on My Winspad 20?

If your Winspad 20 touchscreen has stopped responding, a driver problem could be responsible. Windows depends on touchscreen drivers to communicate with the device’s touch hardware.

Fortunately, you can troubleshoot many touchscreen problems without professional assistance. This guide explains how to install touchscreen drivers on your Winspad 20.

It also covers touchscreen calibration, Windows updates, Device Manager errors, and common driver problems.

Whether your touchscreen stopped working after a Windows update or never worked correctly, these steps can help.

What Is a Touchscreen Driver?

A touchscreen driver allows Windows to communicate with your device’s touchscreen hardware. It translates touch input into commands that Windows can understand.

Without the appropriate driver, your Winspad 20 may not recognise touch input correctly.

A damaged, outdated, missing, or incompatible driver can also cause touchscreen problems. Therefore, checking the driver should be one of your first troubleshooting steps.

Why Is My Winspad 20 Touchscreen Not Working?

Several issues can cause touchscreen problems on a Winspad 20. Understanding the possible cause makes troubleshooting easier.

Common causes include:

  • Missing touchscreen drivers
  • Outdated device drivers
  • Corrupted driver files
  • Disabled touchscreen hardware
  • Windows update problems
  • Incorrect driver installation
  • Hardware damage
  • Windows system errors
  • Touchscreen calibration problems
  • Incompatible operating system updates

Sometimes, restarting the device fixes temporary software problems. However, persistent problems usually require additional troubleshooting.

How Do I Install Touchscreen Drivers on My Winspad 20?

The safest approach is to identify the correct driver before installing anything. Driver compatibility matters because an incorrect driver can create additional problems.

Follow the steps below carefully.

Step 1: Check Your Winspad 20 Model

First, identify the exact Winspad 20 model and Windows version installed on your device.

Open Settings and select System. Then, choose About.

Check the information displayed under device specifications and Windows specifications.

Record details such as:

  • Device model
  • Processor
  • Windows edition
  • Windows version
  • System type

These details can help you identify compatible drivers.

If your device has a model number printed on its casing, record that information too.

Step 2: Check Device Manager

Device Manager is one of the most useful Windows tools for troubleshooting touchscreen problems.

Press Windows + X on your keyboard. Then, select Device Manager.

Find Human Interface Devices and expand the category.

Look for an entry called HID-compliant touch screen.

You may see more than one HID device. Therefore, avoid changing unrelated devices unless you know what they do.

If the touchscreen appears in Device Manager, Windows recognises the hardware.

However, the driver could still be outdated or damaged.

Step 3: Check Whether the Touchscreen Is Disabled

A disabled touchscreen can appear to be completely broken.

Right-click HID-compliant touch screen in Device Manager.

Look for an option labelled Enable device.

If you see this option, select it.

The touchscreen should become available after Windows enables the device.

If you instead see Disable device, the touchscreen is already enabled.

Restart your Winspad 20 and test the screen again.

Step 4: Update the Touchscreen Driver

You can update the touchscreen driver directly through Device Manager.

Right-click HID-compliant touch screen.

Next, select Update driver.

Windows will provide options for finding the appropriate driver.

If Windows can locate a newer compatible driver, follow the installation instructions.

After installation finishes, restart your Winspad 20.

Then, test the touchscreen by tapping several areas of the display.

Step 5: Install a Downloaded Driver Manually

Sometimes Windows cannot locate the correct driver automatically.

In this situation, you may need to install the driver manually.

First, download the appropriate touchscreen driver from a trusted manufacturer or support source.

Save the driver to an easily accessible folder.

Next, open Device Manager again.

Expand Human Interface Devices and locate the touchscreen device.

Right-click it and choose Update driver.

Select Browse my computer for drivers.

Navigate to the folder containing your downloaded driver.

Select the appropriate folder and continue with the installation.

Once installation finishes, restart the tablet.

Never install drivers from suspicious websites. Untrusted driver packages can contain unwanted software or incompatible files.

Step 6: Use Windows Update

Windows Update can sometimes provide compatible hardware drivers.

Open Settings and select Windows Update.

Click Check for updates.

Allow Windows to download and install available updates.

Also check Advanced options and look for Optional updates.

Some Windows versions list hardware drivers under optional updates.

If a touchscreen-related driver appears, install it.

Restart the Winspad 20 afterward.

Step 7: Uninstall and Reinstall the Touchscreen Driver

A corrupted driver may continue causing problems after a standard update.

You can therefore remove the touchscreen driver and allow Windows to reinstall it.

Open Device Manager.

Expand Human Interface Devices.

Right-click HID-compliant touch screen.

Select Uninstall device.

Confirm the removal when Windows asks for confirmation.

Afterward, restart your Winspad 20.

Windows may automatically detect the touchscreen hardware and reinstall its driver.

Check Device Manager after restarting.

Then, test whether touch input works normally.

Step 8: Restart Your Winspad 20

Restarting Windows sounds simple, but it can resolve many temporary driver problems.

Save your work before restarting.

Then, select Start, choose Power, and select Restart.

Avoid using sleep mode when troubleshooting drivers.

A complete restart gives Windows another opportunity to initialise the touchscreen hardware.

After restarting, test basic touch functions.

Try tapping icons, scrolling through menus, and opening applications.

Step 9: Check for Windows Driver Errors

Device Manager can provide useful clues when a touchscreen does not work.

Open Device Manager and locate the touchscreen device.

Look for warning symbols beside the device.

A yellow warning icon can indicate a driver or hardware problem.

Right-click the device and select Properties.

Check the Device status section.

Windows may display an error code explaining the problem.

Write down the error code before changing anything.

This information can help you find the appropriate troubleshooting solution.

Step 10: Run Windows Troubleshooting Tools

Windows includes several troubleshooting features that can identify system problems.

Open Windows Settings and search for available troubleshooting options.

Depending on your Windows version, available troubleshooters may differ.

You can also use Device Manager to inspect the touchscreen device.

If Windows identifies a driver issue, follow the recommended instructions.

After applying a fix, restart your device.

How to Calibrate the Winspad 20 Touchscreen

Sometimes the touchscreen works but responds inaccurately.

For example, you may tap one location while Windows registers another.

Calibration can help resolve this problem.

Search Windows for Calibrate the screen for pen or touch input.

Open the corresponding Control Panel option.

Select the calibration option and follow the instructions.

Windows will display points that you need to touch.

Tap each point accurately when prompted.

Save the calibration settings when finished.

Test the screen afterward.

If calibration makes the touchscreen less accurate, return to the previous settings when possible.

What to Do If the Winspad 20 Touchscreen Still Does Not Work

If driver installation does not solve the problem, investigate other possible causes.

First, check whether the touchscreen appears in Device Manager.

If it does not appear, Windows may not be detecting the hardware correctly.

Next, restart the device and check again.

You should also install available Windows updates.

If the touchscreen remains missing, the problem could involve firmware or hardware.

Physical damage can also prevent touchscreen functionality.

For example, drops, pressure, liquid exposure, or damaged internal connections can affect touchscreen operation.

In such cases, software troubleshooting may not solve the problem.

Consider contacting qualified technical support if hardware damage is suspected.

Can a Windows Update Break the Winspad 20 Touchscreen?

Yes, Windows updates can sometimes create driver compatibility problems.

A major Windows update may replace existing drivers or introduce compatibility issues.

If your touchscreen stopped working immediately after an update, consider checking Device Manager first.

You can also look for a newer compatible driver.

If the manufacturer provides an updated driver, installing it may resolve the problem.

Avoid randomly installing older drivers from unofficial websites.

How to Prevent Future Winspad 20 Driver Problems

Keeping your system updated can reduce driver-related problems.

However, you should avoid installing unnecessary driver packages.

Download drivers from trustworthy sources whenever possible.

Create a system restore point before making significant driver changes.

Additionally, keep important files backed up.

Before installing major Windows updates, ensure your important data is protected.

These simple precautions can make troubleshooting much easier.

Common Winspad 20 Touchscreen Driver Mistakes

Several mistakes can make touchscreen troubleshooting more difficult.

One common mistake is installing a driver designed for a different model.

Another is downloading drivers from unknown websites.

Some users also uninstall several HID devices without knowing their purpose.

This can create additional hardware problems.

Therefore, change only the device associated with your touchscreen.

Also, restart Windows after installing or removing a driver.

A restart allows Windows to reload the hardware configuration.

Winspad 20 Touchscreen Driver Troubleshooting Checklist

Use this checklist when your touchscreen stops working:

  1. Confirm your Winspad 20 model.
  2. Check your Windows version.
  3. Open Device Manager.
  4. Find HID-compliant touch screen.
  5. Check whether the device is enabled.
  6. Update the touchscreen driver.
  7. Install the correct driver manually if necessary.
  8. Check Windows Update.
  9. Uninstall and reinstall the touchscreen driver.
  10. Restart the Winspad 20.
  11. Check Device Manager for error codes.
  12. Calibrate the touchscreen if necessary.
  13. Inspect the device for possible physical damage.
  14. Contact technical support if software troubleshooting fails.

Frequently Asked Questions About Winspad 20 Touchscreen Drivers

How do I install touchscreen drivers on my Winspad 20?

Open Device Manager and expand Human Interface Devices.

Find HID-compliant touch screen, then select Update driver.

You can also manually install a compatible driver from a trusted source.

Restart the device after installation.

Why is my Winspad 20 touchscreen not responding?

A missing, damaged, outdated, or disabled driver could cause the problem.

Windows updates can also create compatibility issues.

Hardware damage is another possible cause.

Start by checking Device Manager for the touchscreen device.

Where can I find the Winspad 20 touchscreen driver?

Look for the driver through the device manufacturer’s official support resources.

You should identify your exact model before downloading anything.

Avoid websites offering unknown or modified driver packages.

How do I enable my Winspad 20 touchscreen?

Open Device Manager and expand Human Interface Devices.

Find HID-compliant touch screen.

Right-click the device and select Enable device if available.

Can I reinstall the Winspad 20 touchscreen driver?

Yes.

You can uninstall the touchscreen device through Device Manager.

Then restart Windows.

Windows may automatically reinstall the required driver.

Why does my touchscreen work after restarting but stop later?

Temporary driver or Windows processes may be causing the problem.

Check for Windows updates and driver updates.

Also inspect Device Manager for warning messages.

Does touchscreen calibration fix an unresponsive screen?

Calibration primarily addresses inaccurate touch positioning.

It generally does not fix hardware or driver failures.

If the screen does not detect touch at all, troubleshoot the driver first.

What if the touchscreen does not appear in Device Manager?

Restart Windows and check Device Manager again.

Then install available Windows updates.

If the device remains missing, investigate firmware and hardware issues.

Professional technical support may be necessary if Windows cannot detect the hardware.

Adreamer WinsPad

Why Isn’t My Touchscreen Working on My Winspad?

A touchscreen makes your Winspad easier to use and navigate. However, touchscreen problems can happen unexpectedly.

Sometimes, the screen stops responding completely. In other cases, only certain areas respond to touch.

Fortunately, several simple solutions can restore touchscreen functionality. Follow these troubleshooting steps before seeking professional assistance.

Restart Your Winspad

First, restart your Winspad to resolve temporary system problems.

A restart can refresh system processes and restore touchscreen responsiveness. Therefore, save your work before restarting the device.

Press and hold the power button until the device shuts down. Then, wait several seconds before turning it back on.

After restarting, test the touchscreen again. If it works normally, a temporary software issue probably caused the problem.

Clean the Touchscreen

Dirt, dust, moisture, and fingerprints can affect touchscreen sensitivity. Consequently, clean the display before trying more complicated solutions.

Turn off your Winspad first. Then, gently wipe the screen with a clean microfiber cloth.

Avoid using excessive moisture directly on the display. Also, avoid harsh cleaning chemicals that could damage the screen.

Once the screen becomes completely dry, test touch functionality again.

Remove Your Screen Protector

A damaged or poorly installed screen protector can interfere with touch sensitivity.

Therefore, inspect your screen protector carefully for cracks, bubbles, or peeling edges.

If possible, remove the protector temporarily. Then, test the touchscreen without it.

If the touchscreen works again, replace the screen protector with a compatible model.

Check for Software Updates

Outdated software can sometimes cause touchscreen problems. Manufacturers regularly release updates that fix bugs and improve device compatibility.

Open your Winspad’s settings menu and check for available system updates.

Install any recommended updates and restart the device afterward. Then, test the touchscreen again.

Keeping your device updated can also prevent similar problems in the future.

Check Touchscreen Settings

Incorrect settings may also affect touchscreen performance. Therefore, review your device’s touch-related settings.

Look for options controlling touch sensitivity, gestures, or display interaction.

Make sure touchscreen functionality remains enabled. Additionally, disable settings that could interfere with normal touch input.

After making changes, restart your Winspad and test the display.

Disconnect External Accessories

Connected accessories can occasionally interfere with device operation. This issue may involve keyboards, mice, USB devices, or other peripherals.

Disconnect every external accessory from your Winspad. Then, restart the device and test the touchscreen.

If the screen works afterward, reconnect each accessory individually. This approach can help identify the problematic device.

Check for Physical Damage

Physical damage can prevent a touchscreen from responding correctly.

Inspect the display for cracks, deep scratches, unusual marks, or signs of impact. Also, check whether the screen has become separated from the device body.

Water or liquid exposure can create touchscreen problems too. If your Winspad suffered physical or liquid damage, avoid opening it yourself.

Instead, seek assistance from a qualified technician.

Perform a Factory Reset

A factory reset can resolve persistent software-related touchscreen problems. However, use this option only after trying other solutions.

A reset removes personal data, installed applications, and customised settings. Therefore, back up important files before proceeding.

Follow your Winspad’s official reset instructions carefully. Afterward, test the touchscreen before reinstalling applications.

When Should You Contact a Technician?

If none of these solutions works, the touchscreen may have a hardware problem.

A faulty digitiser, damaged display, loose connection, or internal component can cause touch failure.

Professional diagnosis can identify the exact cause. Moreover, qualified technicians can replace damaged components safely.

Avoid forcing the screen or opening the device without proper experience.

Final Thoughts

A non-responsive Winspad touchscreen does not always indicate serious damage.

Start with simple solutions, including restarting the device and cleaning the screen. Next, check accessories, software updates, settings, and physical damage.

If these methods fail, professional repair may provide the best solution.

With proper troubleshooting, you can often restore touchscreen functionality without replacing the entire device.